RSSFeeder
Global Moderator
Deep One
 
Karma: 0
 Offline Offline
Posts: 3916

|
 |
« Reply #510 on: 18 March 2015, 14:45:20 » |
|
Now May I Make a Right Choice
"Let me think!" said Aragorn. "And now may I make a right choice, and change the evil fate of this unhappy day!"
J.R.R. Tolkien, The Two Towers
Hard choices and hard roads lie in wait for fans of The Lord of the Rings: The Card Game. Frodo Baggins has disappeared, the Fellowship is broken, and Middle-earth's heroes must now seek a new path forward. In The Treason of Saruman, as in The Two Towers, your adventures turn away from Frodo's quest for a moment and, instead, follow the decisions made by
Aragorn
(The Treason of Saruman, 1) and the Three Hunters.
 In our last preview, developer Caleb Grace offered a glimpse of the trials that lie before you. In the expansion's second scenario, your road leads to Helm's Deep, where you face a novel situation as the encounter deck tries to make progress on the quest and you must stop it. Before then, though, you must rescue your captive companions from the clutches of Saruman's Uruk-hai, and every choice you make will resonate not only throughout your hunt, but at the walls of Helm's Deep, and forward throughout the whole of your The Lord of the Rings Saga campaign.
With their boons and burdens, The Lord of the Rings Saga Expansions ensure that your decisions carry tremendous weight. While each Saga scenario offers a rewarding play experience in its own right, they gain momentum as you play through them in sequence, and your boons and burdens ensure that your past decisions have an impact upon your present and your future.
In today's preview, developer Caleb Grace explores the ways that these decisions and their importance may change in The Treason of Saruman, even as he reveals five of the expansion's new boons and burdens.
Developer Caleb Grace on the Boons and Burdens from The Treason of Saruman
One of the most important features of our The Lord of the Rings Saga Expansions are their boons and burdens. These campaign-specific cards help tie the events of each scenario together, both rewarding and punishing players for their choices along the way. In The Road Darkens Saga Expansion, players received a wealth of powerful boons from the Council of Elrond in Rivendell and the Lady of the Wood in Lórien. Those boons were earned automatically; players didn't need to meet any conditions to win them. The Treason of Saruman marks a shift in the way the players receive boons. As the narrative grows darker and more tense, it's appropriate that this change in tone is reflected in the ways that your choices will carry with you in Campaign Mode. Therefore, you'll find fewer boon cards in The Treason of Saruman, and they are also more difficult to earn.
 For starters, when you set up the expansion's first scenario, The Uruk-hai, you must remove the boon cards
Gildor Inglorion
(The Black Riders, 77) and
Mr. Underhill
(The Black Riders, 17) from the campaign pool. There are two main reasons these boons are removed from the campaign pool: First, they were boons associated with Frodo Baggins, who is not featured in The Treason of Saruman. Second, the boons and burdens from The Lord of the Rings Saga Expansions are meant to tie you into the narrative, even as they serve a mechanical function. The design team felt that the boons would counteract their purpose were Gildor to appear at Isengard, or if Frodo were able to use his disguise as Mr. Underhill to prevent an enemy from attacking him, even as he walked along the footsteps of Mount Doom. So the decision was made to remove them from the campaign entirely. This decision also served to balance the number of boons and burdens to better reflect the dire nature of the heroes quest.
 Even as you lose those boons, you gain an opportunity to earn some exciting new ones. There are four new Skill boons that you can earn at the end of The Uruk-hai:
Intimidation
(The Treason of Saruman, 15),
Hands of a Healer
(The Treason of Saruman, 16),
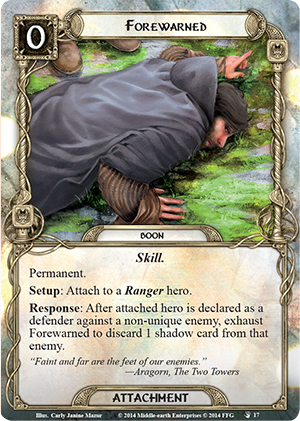
Forewarned
(The Treason of Saruman, 17), and
Leader of Men
(The Treason of Saruman, 18). Each of these boons can only be attached to a hero with the corresponding trait: Warrior, Healer, Ranger, or Noble. Notably, these are the same four traits that your heroes were able to gain via the boon attachments that you could earn at the end of A Knife in the Dark from The Black Riders Saga Expansion. Just as those boons allowed your characters to improve their talents, these new boon attachments represent another opportunity for your heroes to level up by earning powerful abilities to go along with their traits.
However, these boons wont be handed out simply for defeating the scenario, like at the end of A Knife in the Dark. If you want to earn them, you will have to fare exceptionally well against The Uruk-hai. That may prove difficult, and some groups may choose to replay the scenario multiple times in order to earn the boons.
Will You Be Hindered by Poisoned Counsels?
 On the flip side, it is easy to earn the new burden card,
Poisoned Counsels
(The Treason of Saruman, 21). This nasty little treachery has a player card back because it is shuffled into a players deck when it is earned. Then, if you draw it into your hand from the deck, Poisoned Counsels forces you to discard every other card in your hand. And all that is necessary to earn this burden is to spend a little time in Edoras, wrestling with Wormtoungues lies.
At the beginning of the scenario, Helms Deep, the players are faced with a choice: advance immediately to Stage 2A and face Saruman's armies, or spend a turn in Edoras to prepare their forces.
You may not want to earn the burden, but that free turn is hard to pass up. In addition to allowing you to skip the quest phase, Stage 1B allows each player to put an ally into play for free! Those extra allies can mean the difference between questing successfully or unsuccessfully during the first quest phase at Stage 2B. Also, it's entirely possible that you may never draw Poisoned Counsels. You'll only have one copy in a deck of at least fifty cards. There's no guarantee that you will ever see it, but if you do, it will definitely have an impact on the game.
The design team spent a lot of time developing these boons and burdens to give you the best possible Saga experience and to deliver on our promise to make decisions matter. Along with the challenges of your quests and the encounter deck, these boons and burdens should add some dramatic ups and downs to the course of your epic The Lord of the Rings campaign!
Thanks, Caleb!
In your The Lord of the Rings campaign, as you continue along the road to Mordor and the fires of Mount Doom, you are accompanied by the consequences of the decisions you make. Will you make the right decisions? You will soon have your chance to find out. The Treason of Saruman is coming!
Discuss this article
in our forums!
The copyrightable portions of The Lord of the Rings: The Card Game and its expansions are © 2011 - 2013 Fantasy Flight Publishing, Inc. The Lord of the Rings, and the characters, items, events and places therein are trademarks or registered trademarks of The Saul Zaentz Company d/b/a Middle-earth Enterprises and are used, under license, by Fantasy Flight Games. Living Card Game, LCG, LCG logo and Fantasy Flight Supply are trademarks and/or registered trademarks of Fantasy Flight Publishing, Inc. All Rights Reserved to their respective owners.
Source: Now May I Make a Right Choice
|
|
|
|
« Last Edit: 18 March 2015, 15:45:05 by Zarniwoop »
|
 Logged
|
|
|
|
RSSFeeder
Global Moderator
Deep One
 
Karma: 0
 Offline Offline
Posts: 3916

|
 |
« Reply #511 on: 19 March 2015, 16:45:12 » |
|
Start Your Smuggling Run
Chewie, this wont help me! Save your strength, therell be another time!
Han Solo, Star Wars: The Empire Strikes Back
Ally Packs and Villain Packs for Imperial Assault bring new adventure to your campaign and skirmishes! In all figure packs, youll find detailed plastic figures of iconic characters, as well as new Command cards, Agenda cards, Reward cards, and Deployment cards. In addition, each figure pack features a new campaign side mission and two new skirmish missions that use the same map.
In our last preview, we explored an infamous rogue and a deadly bounty hunter with the Han Solo Ally Pack and the IG-88 Villain Pack. Today, well take a look at the new strategies opened by two more figure packs as we preview the Chewbacca Ally Pack and the General Weiss Villain Pack!
A Wookiees Loyalty
Chewbacca
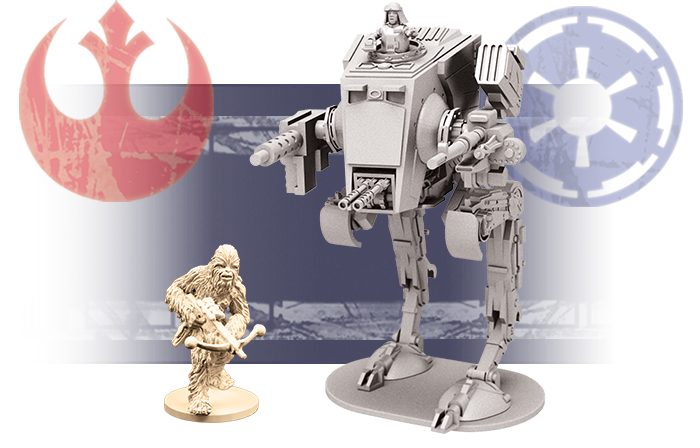
is widely known as Han Solos companion and protector, and this Wookiee is fearsome combatant and a worthy ally for any team of Rebels. Whether you use him in a campaign mission or a skirmish mission, Chewbacca's two abilities highlight the two major roles he can fill.
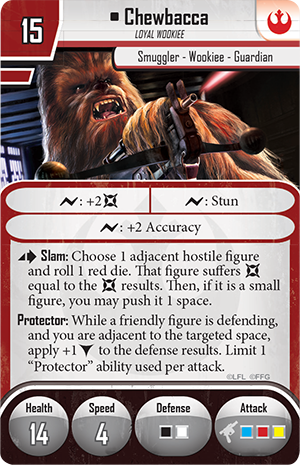
Chewbaccas first role is as a front-lines fighter, dealing damage and clearing the way for other heroes. His Slam ability is a crucial part of this ability. By using Slam as an action, Chewbacca can choose an adjacent hostile figure and roll a red die. The chosen figure suffers damage equal to the die result, and if the target is a small figure, Chewbacca can push it one space.
Dealing damage when your opponent cannot roll defense dice is a massive benefit, and with one red die, Chewbacca can deal significant damage with every Slam. If the figure survives the blow, you may also be able to push it one space. One space might not seem like much, but thats often all you need to block your opponents firing lanes, forcing him to move to a less advantageous position before opening fire.
Chewbaccas second ability reflects his identity as a guardian. With the Protector ability, Chewbacca grants all adjacent friendly figures a bonus block whenever they roll defense dice. A bonus block is useful no matter what your situation, and it can sometimes make the difference between life and death for a figure.
In your campaigns, Chewbacca is a great asset for any Rebel strike team. In many campaign missions, the Imperial player wins if he wounds all of the heroes. Chewbacca's Protector ability forces your opponent to deal much more damage if he wants to wound the heroes for victory. Chewbaccas damage dealing prowess can also clear the way for your heroes, but the Imperial player often redeploys any units that are destroyed. You can make this option less appealing with the
Intimidation
Reward card. This card can be depleted during a mission after you defeat the last figure in a group to increase the deployment cost of that group by two! You gain this card by winning the Celebration side mission, which is included in the Chewbacca Ally Pack.
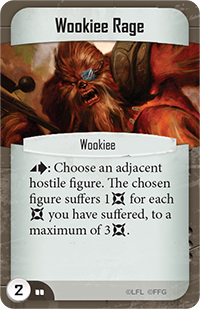

Chewbacca offers similar benefits in your skirmish missions, whether you play with the new Imperial Labor Camp map or another skirmish setting. New Command cards in this Ally Pack invite you to enhance your strategies for Chewbacca and other figures. You may use
Wookiee Rage
to damage an adjacent hostile figure without allowing him to roll defense dice. Alternatively, you may use
Hold Ground
to keep hostile figures from exiting spaces adjacent to a Guardian unit, buying your other figures time to accomplish objectives. Finally, you may take revenge for a friendly figures defeat by playing
Debts Repaid
. This card allows you to ready Chewbaccas Deployment card and Focus him, setting up a devastating reprisal on your next turn.
The Generals Command

While smugglers like Chewbacca flout Imperial law, there are those who are completely committed to upholding the Empire. One of these men is
General Weiss
, a field commander of Imperial forces. With the General Weiss Villain Pack, you can construct either a standard AT-ST or General Weisss own heavily modified assault walker.
On the battlefield, General Weisss customized walker is a formidable presence. The Epic Arsenal ability illustrates its firepower, allowing the general to form an attack pool out of any three attack dice. General Weiss may use two blue dice and a green die to attack heroes at long-range, or overwhelm nearby targets and trigger surge abilities with two red dice and a yellow die, or any other combination of dice. Whatever your situation, Epic Arsenal ensures that you always have the best possible dice.
General Weiss also possesses a keen tactical mind and an understanding that, in battle, positioning is one of your most valuable assets. The Generals Orders ability allows you to choose up to two other friendly figures on the map and perform a move with those characters. By keeping your forces mobile, you can take up position on new firing lanes or make tactical retreats to keep your troops from being surrounded by enemy forces.
In your campaign games General Weiss can put his tactical expertise to use by ordering your other troops to charge into battle or claim objectives, even while he focuses his firepower on the heroes. No hero can hold out long against concentrated fire from General Weiss, and by wounding the heroes one at a time, you can bring the Empire closer to victory every turn.
Of course, The Generals Scheme agenda set means that Weisss influence is not limited to the battlefield. You may lure the heroes into the
Forest Ambush
side mission, you may give an
Inspiring Command
to focus figures adjacent to an Imperial Leader, or you may make
Special Modifications
to a normal AT-ST to grant it increased firepower.


Your Imperial skirmish forces can also benefit from General Weiss and his unique talents as well as the new Command cards included in this Villain Pack. You can battle within a new skirmish map the Imperial Research Lab, an area filled with narrow corridors. In these confined quarters, a card like
Explosive Weaponry
could easily damage a large amount of enemy figures by giving your attack Blast 1. Alternatively, you can take advantage of General Weisss large size with
Overrun
. In his assault walker, he can fill almost any passage, and Overrun allows you to damage hostile figures when you enter their spaces. Another new Command card allows Weiss to call upon the
Endless Reserves
of the Empire. Endless Reserves brings a defeated friendly Trooper back to its group, and after use, this card is shuffled back into your Command deck.
Prepare for Battle
You may live a lawless life on the Outer Rim, free from any governments interference. You may work to uphold the galactic order of the Empire by any means necessary. No matter which side you support, its time to enter the Galactic Civil War.
Pre-order your Ally Packs and Villain Packs at your local retailer today, and check back for our preview of the Rebel Troopers and the Royal Guard Champion.
Discuss this article
in our forums!
Source: Start Your Smuggling Run
|
|
|
|
« Last Edit: 20 March 2015, 01:35:04 by RSSFeeder »
|
 Logged
|
|
|
|
RSSFeeder
Global Moderator
Deep One
 
Karma: 0
 Offline Offline
Posts: 3916

|
 |
« Reply #512 on: 19 March 2015, 16:45:12 » |
|
The Bottom Line
I dont want your congratulations. I just want the credits you owe me.
Gabriel Santiago
Today, in the penultimate installment of our faction overviews for Android: Netrunner, we hack into Corp HQ and take a look at the games winningest Runners, the Criminals. Our guide? 2014 World Champion Dan DArgenio, who paired his Criminals with Jinteki for the tournament. As he suggests, the tricks and tactics employed by the games Criminals might not appeal to everyone, but if youre interested in winning at the highest levels of competition, you ought to at least understand what makes these Runners tick.

Cash Rules All
Shapers hack into the servers of multinational corporations for the challenge. Anarchs run to tear down the corporations and societal norms they despise. Criminal runners get into their line of work because if youre good at it its just so fantastically profitable. Theres a big prize in the mainframe of NBN headquarters, and Criminals are in it to win it. If youre the type of win-at-all-costs Runner who wants to use every dirty tactic available, Criminal is the faction for you.
All that matters is the bottom line, and the bottom line is that Criminals have been the most successful faction of runners in the history of Android: Netrunner.
The Criminal Syndicate
 Straight out of the Core Set,
Gabriel Santiago
(Core Set, 17) was a force to be reckoned with. Gabe thrives when he is getting right in the face of the Corp, and he is equipped with the tools to do so.
-
Inside Job
(Core Set, 21) not only threatens a Corporations remote servers, but can combo with
Emergency Shutdown
(Cyber Exodus, 43) to undo all the hard work it took to rez that
Wotan
(Second Thoughts, 30).
-
Sneakdoor Beta
(Core Set, 28) allows Gabe to pressure the Corps oft-neglected Archives and get paid to do so.
- He can import Anarch cards like
Datasucker
(Core Set, 8),
Knight
(Mala Tempora, 43), and
Parasite
(Core Set, 12) to make sure he has continuous access to HQ for a reasonable price.
The two credits he earns might not seem like a lot, but if youre getting it every turn and accessing agendas from the Corps hand, it can add up quite quickly. As soon as the game starts, any plans the Corporation might have had to build up its other servers are immediately put on hold as it tries to keep Gabe from tearing apart its HQ, even if there isnt much there.
 The next Criminal runner to be released solidified the factions position as top dog for years to come. Meet
Andromeda
(Humanitys Shadow, 83), a dispossessed ristie and the first lady of Android: Netrunner.
From the Corps perspective, Gabe is a pest. A nuisance. Andromeda is downright oppressive. Born into an upper-class family, Andy begins the game with quite the head start. Nine cards might not seem that much better than the next top-tier runners effect, but her ability to start the game powerfully and consistently has propelled her to the front of the pack.
Opening turns like
Sure Gamble
(Core Set, 50),
Desperado
(Core Set, 24),
Security Testing
(Honor and Profit, 48), and
Dirty Laundry
(Creation and Control, 52) are the embodiment of the Criminal enterprise. This is a common start for Andromeda, and it means that on turn two, you have arguably the best console in the game already in play, plenty of money to install your programs, and what amounts to a three-credit-per-click
Magnum Opus
(Core Set, 44), but one that isnt taking up any memory. And thats before you install your Datasucker and hit up
John Masanori
(Opening Moves, 9).
After Andromeda, the Honor and Profit expansion introduced us to three new Criminal identities.
-
Ken "Express" Tenma
(Honor and Profit, 29) continues in the tradition of making money by staying on his feet. His ability can pay out as well as Gabes if you build your deck correctly, and an extra couple of influence points means that Ken can make use of an extra copy of
The Maker's Eye
(Core Set, 36) to add R&D pressure to the Corporation while they struggle to cover HQ.
-
Silhouette
(Honor and Profit, 30) is more of a niche runner, but a slim deck size grants her consistency, and shes always a great girl to have around if youre facing down a lot of Jinteki players using
Mushin No Shin
(Honor and Profit, 15) to deploy ambushes.
-
Iain Stirling
(Honor and Profit, 28) is the strangest of the bunch. A good strategy is to leverage a
Hostage
(Opening Moves, 4) in the early game to amass a lot of resources, and if the Corporation seizes the opportunity to score first, you then get a huge bonus payout of two credits per turn.

Tricks of the Trade
Criminals are not so much about building towards a powerful rig like their Shaper counterparts. Sure, they claim Desperado is the best console and piece of hardware in the game, and they say they own a few of the best programs as well, but being a Criminal is all about using your tactics to bring the Corporation to their knees.
Account Siphon
(Core Set, 18) has been turning the tables on the Corporations bankroll for a long time. As Corp players have gotten better at making money, it has dropped off in relative power level, but just the threat of Account Siphon still means that no matter if youre playing Gabe or Silhouette or some other less-HQ-focused Criminal, defending home base has to be first priority. Few other cards in the game can threaten a fifteen-credit swing, and a well-timed Account Siphon attempt, even if unsuccessful, could cause the Corporation to expend so many credits protecting themselves that their other servers become easy to access.


Inside Job and Emergency Shutdown go hand in hand. Is there a pesky
Tollbooth
(Core Set, 90) keeping you out of HQ? No problem. Go around, get in, and shut it down. No icebreaker necessary.
When you do need to eventually start breaking ice,
Special Order
(Core Set, 22) ensures that the Criminal never has to dig too hard to find the right tool for the job. So what if we dont have in-faction breakers like
Gordian Blade
(Core Set, 43),
Corroder
(Core Set, 7), or
Yog.0
(Core Set, 14)? We only need to spend influence on one copy of each, and theyll always be a phone call away. Just make sure you have a
Faerie
(Future Proof, 104) ready in case you run into a
Grim
(Opening Moves, 20) or
Archer
(Core Set, 101), and your singleton Corroder will stick around for the entire game.
Finally,
Legwork
(Honor and Profit, 35) is the newest addition to the high-power Criminal event suite.
R&D Interface
(Future Proof, 107) and
Medium
(Core Set, 10) are great for sustained R&D pressure, but when it comes to HQ, its usually more efficient to get in, get out, and call it a day. Most Criminals dont want to waste too much time pounding HQ and seeing the same card over and over again. With Legwork, we can wait for a few turns until the agendas pile up in the Corps hand and steal tons of points just by getting in one time. The heist to end all heists. If it doesnt end the game on the spot, we can turn our attention to R&D once were reasonably sure weve taken HQ for all its worth.

The Right Tool for the Job
A discussion of the Criminal faction wouldnt be complete without talking about what I believe is the single best Runner card in the game. I think that most competitive players would argue that Desperado holds that honor. Even at the steep cost of three influence, it is still the most splashed console in Shaper and Anarch decks, and for good reason: for the low startup cost of three credits, Desperado is an offer you cant refuse.
 One of the most common mistakes that beginners make when building Criminal decks is to include fewer than three Desperado. For the same cost,
Doppelganger
(A Study in Static, 64) looks like it might be just as good or better, and
Logos
(Honor and Profit, 37) seems like it could be a better fit in some slow decks. You can certainly choose to build a Criminal deck that functions perfectly well without Desperado, but doing so is just handicapping yourself. Three Desperados means that you get it into play as soon as possible, which means that you start getting paid as soon as possible. If youre playing Datasucker and the Corp has an undefended Archives, you suddenly have an option available thats significantly better than clicking for a credit. If youve got Security Testing in play too, youre starting to become more efficient than a Shaper with a full rig could ever hope to be. If youve got John Masanori by your side as well, you can gain three credits, a virus counter, and a card draw for just a single click, once per turn. Magnum Opus and
Professional Contacts
(Creation and Control, 49), eat your heart out.
Even without including all these combos in your deck, Desperado can function like a point of bad publicity and a memory chip in one package. Looking at cards like
Frame Job
(Opening Moves, 1) and
Activist Support
(True Colors, 62), its clear that the cost of an actual point of bad publicity is pretty high. Much higher than the three credits you have to invest in your Desperado. Unlike an actual bad publicity, Desperado can pay you for free runs, such as checking Archives or newly installed assets in remote servers. An early Desperado also supercharges your face-checking. If the corporation wants to keep a
Rototurret
(Core Set, 64) unrezzed until you install a program or keep its HQ ice face-down until you try to Account Siphon them, Desperado is going to make them pay for that luxury in more than just random accesses.
I Aint a Killer, But Dont Push Me
Being a good runner means getting in and out without making a big mess. The fact that Criminals often have to import their icebreakers from other factions means that they dont have a lot of spare copies left in the stack. This means that Criminals need some protection from the Corporations nasty destroyer ice. Thankfully, while Criminals are not known in hacking circles for their programming, there is one type of program that they do better than anyone else: killers.
Being able to break sentry subroutines efficiently is a huge advantage for Criminals, as sentries often have the most painful subroutines for the Runner to let go unbroken. Because Criminals can so readily protect the few programs in their deck from trashing subroutines and net damage with the killers that they have in-faction, they dont have to worry about losing their only Corroder when theyre face-checking or Security Testing the Corps ice.

Possibly the best killer, possibly even the best icebreaker in Android: Netrunner is the ephemeral Faerie. While a one-time-use breaker may initially seem innocuous, its the nature of sentries that makes Faerie such a powerhouse. Sentries tend to fall into one of two categories. On one hand, you have those sentries that can be dealt with without programs, such as
Caduceus
(What Lies Ahead, 19),
Shadow
(Core Set, 104),
Data Raven
(Core Set, 88), and
Pup
(Honor and Profit, 18). On the other hand, you have sentries that are very damaging to face-check but are often a pain to rez, such as Grim, Archer,
Komainu
(Honor and Profit, 17), and
Flare
(Future Proof, 117). A Faerie on the board not only costs zero to deploy, but it enables you to safely run into face-down ice until the Corporation rezzes something truly nasty. Because its so cheap to use, this often means that the Corp has to give up a big tempo hit to get a Criminal to use his or her Faerie, often along with an access and important information about where its most dangerous ice is located.

Femme Fatale
(Core Set, 26) is another very strong killer that Shapers have been importing for just one influence point since the beginning of the game. While Criminals arent easily able to play her with
Stimhack
(Core Set, 4) and
Self-modifying Code
(Creation and Control, 46) or by combining
Test Run
(Cyber Exodus, 47) with
Scavenge
(Creation and Control, 34), the ability to ensure passage past any piece of ice is usually worth her steep cost. Criminals frequently find themselves using Femme to target a piece of HQ ice the Corporation has refused to rez in order to guarantee a successful Account Siphon, or theyll use her in conjunction with an Inside Job to get deep into a remote server with two layers of ice. The fact that it costs two credits to pump her strength can make her somewhat expensive, but the often-imported Datasucker can help bring opposing sentries down to Femmes level. Additionally, Femme has the big benefit of being able to get around ice like powerful, taxing sentries like Komainu and Tollbooth for nothing, or next to nothing.
Theres a newer Criminal killer on the block that is also starting to make waves. Though it demands access to a lot of stealth credits,
Switchblade
(Up and Over, 77) is the most cost-efficient killer in the game. For the low start-up cost of three credits and access to enough recurring stealth credits, you can break just about any sentry for free. Grim, Archer, and Komainu all fall victim to a Switchblade and two
Silencers
(Double Time, 104), making it an awesome choice for any Criminal who is tired of breaking bank on the plethora of multi-subroutine sentries protecting the Corporations servers these days.
Whoever Said Crime Doesnt Pay
didnt play Android: Netrunner. The winningest faction in the game is a powerhouse thats here to stay, thanks to strong identities, an extremely effective console, and game-changing events. One of the biggest reasons to stay within the Criminal family is that some of their best cards, Desperado, Faerie, and Account Siphon to name a few, are irreplaceable and heavy on influence cost. If you want to play three of all of these cards in your deck, use them to tear through corporate servers with terrifying efficiency, and win World Championships, then its time for you to start exploring the advantages native to a life of crime.
Discuss this article
in our forums!
Netrunner is a TM of R. Talsorian Games, Inc. Android is TM & ©2015 Fantasy Flight Publishing, Inc. All rights reserved. Netrunner is licensed by Wizards of the Coast LLC. ©2015 Wizards.
Source: The Bottom Line
|
|
|
|
« Last Edit: 20 March 2015, 01:33:23 by Zarniwoop »
|
 Logged
|
|
|
|
RSSFeeder
Global Moderator
Deep One
 
Karma: 0
 Offline Offline
Posts: 3916

|
 |
« Reply #513 on: 20 March 2015, 09:45:14 » |
|
Wave VI Is Now Available
This bounty hunter is my kind of scum, fearless and inventive.
Jabba the Hutt
Bounty hunters, illicit technology, Salvaged Astromechs, pirates, and Black Sun operatives. The sixth wave of X-Wing starship expansions has arrived!
- Most Wanted Expansion Pack
- StarViper Expansion Pack
- M3-A Interceptor Expansion Pack
- IG-2000 Expansion Pack
Now available at retailers everywhere, X-Wing Wave VI marks the introduction of the games third faction, the galaxys Scum and Villainy, a collection of individuals loosely bound by their shady business endeavors.
Ultimately, the whole wave reflects the fact that this new factions pilots are less interested in teamwork and collective victories than personal gain. Their unique pilot abilities encourage different types of squadrons than those commonly employed by Rebel and Imperial players, as do their new starships, illicit upgrades, and Salvaged Astromechs.

New Faction. New Style.
The members of the Scum and Villainy faction may not be the most cooperative or disciplined military force in the galaxy, but their myriad tricks are certain to cause all manner of trouble for the games Rebel and Imperial pilots. Likewise, their arrival is destined to shake up the X-Wing metagame, opening the way for all sorts of new squads to make inroads in tournament and casual play.
Several pilots, specifically, are destined to make major impacts upon the game, even when they dont appear on the table:
Torkhil Mux
is likely to change the very nature of the pilot skill bidding war. As two-time World Champion Paul Heaver explains it, In most cases, the ideal pilot skill value is one higher than whatever your opponent is fielding. But spending squad points to hit that ideal pilot skill is a gambit that can fail if your opponent has pilots with higher skill than yours, or simply doesnt bother to bid on pilot skill and just sticks with the minimum skill levels. As a HWK-290 pilot with a low pilot skill and commensurate cost Torkhil Mux is a cheap bid for pilot skill; however, he also nullifies much of the benefit your opponent seeks to get by investing his points into his pilots pilot skill values. At the end of the Activation phase, he can reset one enemy pilots skill to 0 until the end of the Combat phase, meaning that even though your opponent bid higher for pilot skill values, your ships get to fire first.
Emon Azzameen
is another pilot whos likely to shake up the metagame. In his
Andrasta
, Emon Azzameen is almost without peer as a bomber. Like any pilot capable of delivering a payload of
Seismic Charges
or
Proximity Mines
, he can use the 1 straight template; however, Emon Azzameen may instead choose to use the 3 straight template or either 3 turn template. The option to use these alternate templates to drop his bombs gives Emon Azzameen much greater control over their impact on the battlefield (as shown below), and that means that X-Wing players are likely to see more bombs on the battlefield than ever before.

Emon Azzameens ability to choose from any one of four different templates as he drops his bombs makes the battlefield a more hazardous place than ever before.
Finally, the arrival of IG-88 is likely to spur a dramatic rise in the number of two-fighter squad builds. Not only do the four iterations of IG-88 all pilot the fast, durable, and hard-hitting Aggressor, but if they upgrade their Aggressors with the
IG-2000
Title, they also become the first pilots able to share pilot abilities. This means that in squads that run two Aggressors with the IG-2000 Title, you can mix-and-match the four different IG-88 pilot abilities, pairing such elements as
IG-88B
s built-in
Gunner
ability with
IG-88C
s free evade action. Or you could pair
IG-88A
s ability to regain shields after eliminating foes with
IG-88D
in order to gain extra maneuvers on your maneuver dial. However you choose to partner IG-88s unique pilot abilities, these dual-Aggressor builds add an all-new form of customization to your squads.
Of course, those are just a few examples of the many, many ways that the Scum and Villainy faction and its pilots are likely to change the game. Throughout our previews, weve explored even more of the ways that the Scum and Villainy faction will utilize their starships, illicit upgrades, and unique pilot abilities.
Read Our Previews for More Information
- In Illicit Dealings, we looked at the two new upgrade types unique to the Scum and Villainy faction, the illicit upgrade and the Salvaged Astromech. By offering a distinctive range of dirty, aggressive, and expensive tricks, these upgrades go a long way toward establishing the factions overall intent and feel.
- In The Galaxys Most Wanted, Part One and The Galaxys Most Wanted, Part Two, you can read about how the Most Wanted Expansion Pack, its ships, upgrades, and pilots give the faction and its dirty tricks a massive jump start, helping it quickly get up to speed against the established powers of the Rebel and Imperial fleets.
- In Lethal Ambitions, we looked at the StarViper-class attack platform and its renowned creator,
Prince Xizor
- In Intercept and Destroy, we explored the many ways that Scum fleets might deploy the versatile M3-A Scyk interceptor. A light, but highly customizable, starfighter, the Scyk can be flown in large groups, or it can be outfitted with the
"Heavy Scyk" Interceptor
Title and utilize a cannon like the
"Mangler" Cannon
or
Ion Cannon
to confront enemy fleets.
- In Cold, Metal, and Evil, we looked at the IG-2000 Expansion Pack, its deadly Aggressor, the ships maneuver dial, the four unique versions of IG-88, the IG-2000 Title, and the expansions other upgrades. Not only is the Aggressor the first large-base starfighter to feature an inherent boost action, its also one of only two large-base starships in the game with only a forward firing arc. Still, while the other such starship, the Lambda-class shuttle, is notorious for its sluggish maneuver dial, the Aggressor is a surprisingly fast and maneuverable vessel, and the preview looks at some of the ways its maneuverability is likely to make it both a challenge and a joy to field in battle.

IG-88s Aggressor comes loaded with all sorts of maneuvers, including the startling new
Segnor's Loop
. Still, you can load IG-88Ds unique pilot ability into your squad for even more maneuvers, gaining the option to perform a Segnors Loop at the end of either 3 turn template. All these maneuver options, along with the ships inherent boost action, make it truly difficult for your opponent to guess where your Aggressor will end its Activation phase.
Do Not Underestimate Them
You can either profit by this or be destroyed. Its your choice.
Luke Skywalker
X-Wing Wave VI is here. The Scum and Villainy faction is here. You can dive into the heart of the Galactic Civil War, or you can try to make a profit in the fringes of the galaxy. Its your choice.
Head to your local retailer to pick up your X-Wing Wave VI expansions today!
Discuss this article
in our forums!
Source: Wave VI Is Now Available
|
|
|
|
« Last Edit: 20 March 2015, 10:51:13 by RSSFeeder »
|
 Logged
|
|
|
|
RSSFeeder
Global Moderator
Deep One
 
Karma: 0
 Offline Offline
Posts: 3916

|
 |
« Reply #514 on: 21 March 2015, 12:45:11 » |
|
Faith, Science, and Shotguns
"The police could not but realise that they had stumbled on a dark cult totally unknown to them."
H.P. Lovecraft, The Call of Cthulhu
Confronted by horrifying, otherworldly monsters and by the evidence of foul rituals that defy all human decency and human comprehension, as your perceptions of reality suddenly shatter and as your world expands to include vast, cold darknesses full of new terrors, will you recoil from the discoveries? Will you succumb to madness? Or will you take up your torch and your shotgun and head into the darkness with a new resolve, standing alongside those few other brave men and women who have also come to a similar understanding of the nature of human existence
For the Greater Good is now available at your local retailer and online though our webstore!
The eighth deluxe expansion for Call of Cthulhu: The Card Game, For the Greater Good adds 165 new cards to the game (three copies each of fifty-five different cards), roughly two-thirds of which bolster the ranks of the Agency faction, which purportedly serves humanity's interests as its front-line defenders in the ongoing struggle for survival in the face of foul cultists, ghouls, monsters, and elder gods. Though the conspiracies run deep and it's not entirely clear whether or not everyone associated with the Agency's Government networks has humanity's best interests at heart, the faction's agents gain renewed powers to operate in all fields, as the expansion adds a host of new characters that greatly bolster the Government trait. Meanwhile, the Hunters of Ardenne battle against evil, emboldened by both faith and science.
Of course, the game's other factions don't sit idly by as the Agency extends its networks. Each of the game's seven other factions gains new characters and support cards, as well as the ability to draw upon several new neutral cards, including the Ancient One
Iod
(For the Greater Good, 36) and the Polar event
Ice Storm
(For the Greater Good, 38).

Gear Up
Whether or not it's fully justified, the Agency has long held a reputation as the "attachment faction" of Call of Cthulhu: The Card Game. This likely owes in part to such characters as
James Logan
(Whispers in the Dark, 1) and
John Henry Price
(Search for the Silver Key, 61), who make attachments better in decks with them than without them. However, the reputation also owes greatly to the tremendous utility that the faction gains from its attachments and to the fact that even though the Agency ranks fifth among the factions in terms of total support cards, it has more attachments than all but three: Miskatonic University, the Syndicate, and Yog-Sothoth.
Notably, those three factions have all benefitted greatly from their own faction-focused deluxe expansions, and once For the Greater Good arrives and helps the Agency fill its rank with new recruits, those recruits will also benefit from an influx of new supports, including several noteworthy attachments.
For the Greater Good provides every faction with at least one one-cost support card that attaches to a story and impacts the way that characters will need to approach it. The Agency gets two of these cards, including
Under Surveillance
(For the Greater Good, 23). The Agency has long excelled at Combat struggles, and Under Surveillance ensures that your Government hit squad will be able to start its investigations on the right foot, both by playing to its strength as it begins resolving the story's struggles and by providing an alternative benefit for winning Combat struggles at the story. Armed with a
Lightning Gun
(Secrets of Arkham, 3), a Hunter like the
Relentless Stalker
(For the Greater Good, 5) could potentially hold off an entire army of cultists or earn up to four success tokens against a character without Invulnerability.
As far as Invulnerability goes, Agency operatives gain some of that in the form of their new
Armored Car
(For the Greater Good, 25). The absolute best protection that money and science can offer in the face of devouring Ancient Ones and
Ravagers from the Deep
(Core Set, 46), an Armored Car grants Invulnerability to all your characters at the same story. Better yet, because you can transfer it from character to character as an action, you make sure that it ends up at the story where you need it most. Just save a resource to race it to the scene of the otherworldly invasion!
Finally, since there's no guarantee that the Ancient Ones or their cultists will reveal themselves in an urban area, the Agency's operatives need to be ready to confront their evils wherever they should arise, even if that means heading to the frozen tundra of Siberia or to the icy wastes of Antarctica. Preparation is key, and For the Greater Good gives your agents the means to travel to the coldest of climes with a
Snowmobile
(For the Greater Good, 21). The game's second Polar attachment, Snowmobile allows you to count the attached character's icons not only where it is committed but at each other story where you have characters committed, as well. Again, that makes it a powerful attachment to combine with the Relentless Stalker, who can choose not to uncommit from a story until it is won.
Descend into Madness
"Investigations and discoveries have left their mark upon him; so that his voice trembles when he tells them, and his hand trembles when he tries to write of them."
H.P. Lovecraft, The Case of Charles Dexter Ward
As well as the Agency's new tools may help your operatives survive the terrors they may encounter in their defense of humanity, they won't be able to bleach the horrors from their minds. Still, in the face of absolute chaos and ultimate ruin, there's not much choice but to stand and fight.
Now is the time to celebrate those who stand at the front lines of the greatest battles never to make the news. Now is the time to honor those who have silently and secretly fought long and hard For the Greater Good. Head to your local retailer today to pick up your copy of this eighth deluxe expansion for Call of Cthulhu: The Card Game!
Discuss this article
in our forums!
The copyrightable portions of Call of Cthulhu: The Card Game are © 2008 - 2013 Fantasy Flight Publishing, Inc. Call of Cthulhu is a registered trademark of Chaosium, Inc. Living Card Game, LCG, LCG logo and Fantasy Flight Supply are trademarks and/or registered trademarks of Fantasy Flight Publishing, Inc. All rights reserved to their respective owners.
Source: Faith, Science, and Shotguns
|
|
|
|
« Last Edit: 21 March 2015, 14:46:45 by RSSFeeder »
|
 Logged
|
|
|
|
RSSFeeder
Global Moderator
Deep One
 
Karma: 0
 Offline Offline
Posts: 3916

|
 |
« Reply #515 on: 23 March 2015, 09:45:04 » |
|
A Galaxy at War
My ship has fallen under attack and Im afraid my mission to bring you to Alderaan has failed. I have placed information vital to the survival of the Rebellion into the memory systems of this R2 unit. My father will know how to retrieve it. You must see this droid safely delivered to him on Alderaan. This is our most desperate hour.
Leia Organa
Recently, in our preview of the fleet-building rules for Star Wars: Armada, we mentioned that each fleet must contain three objectives. These objectives add a narrative element to your games, helping to explain why you and your opponent are sending starships into battle. More importantly, though, objectives change how you score points, meaning that your games of Armada arent just about blasting away more of your opponents starships than you lose in the process.
Today, well look at these objectives more closely, reviewing all twelve of them, and exploring how they may influence the path you take toward victory.
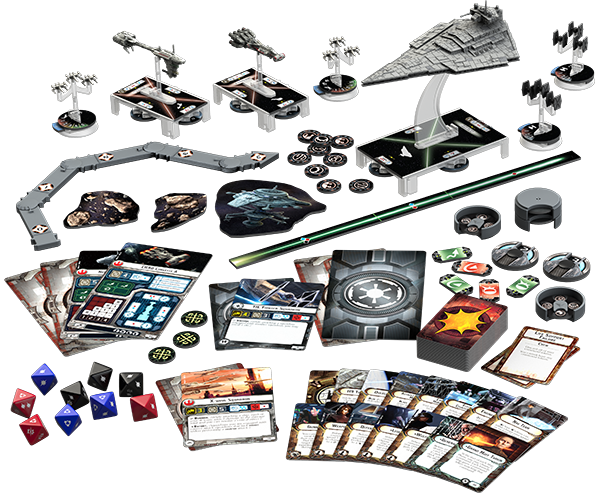
The objectives of Star Wars: Armada work along with its starships, squadrons, maneuver tool, ship cards, upgrades, command dials, attack dice, and obstacles to ensure that every single one of your battles has multiple dimensions.
Choosing an Objective
There are three categories of objectives in Armada, and you have to bring one objective from each category.
Assault: Assault objectives typically identify one or more ships that are worth extra fleet points when destroyed.
Defense: Defense objectives encourage you to position your ships so that they control specific sections of the battlefield.
Navigation: Navigation objectives reward you for maneuvering aggressively and with precision.
Early in the games setup, you and your opponent choose one objective to use for the game.
Setup Step 3. Determine Initiative: The player whose fleet has the lowest total fleet point cost chooses which player is the first player. The first player places the initiative token next to his edge with the a side faceup. If the players are tied in fleet points, flip a coin to decide which player makes the choice.
Setup Step 4. Choose Objective: The first player looks at all three of his opponents objectives cards and chooses one to be the objective for the game.
The other objectives are all set aside.
Throughout your game, the additional rules and scoring concerns that the objective introduces can greatly impact your tactics. Therefore, although its usually to your advantage to have the initiative throughout a game, its easy to imagine situations in which youll concede the initiative to your opponent in order to ensure that you play with one of your objectives, forcing your opponent to fight on terms that are favorable to your fleet.
Assault
The four different assault objectives are
Advanced Gunnery
,
Most Wanted
,
Precision Strike
, and
Opening Salvo
.
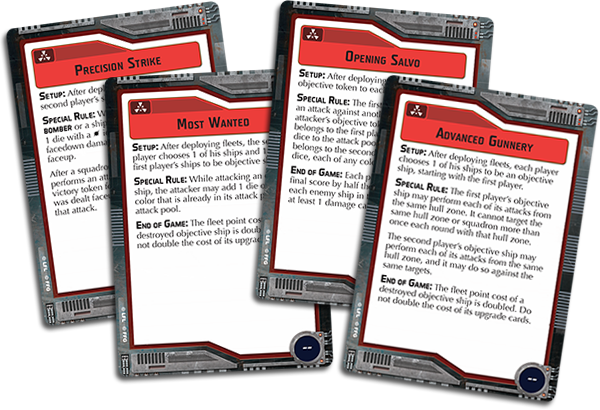
Of these assault objectives, two force you and your opponent to identify objective ships, which are worth twice as many victory points at the end of the game if theyre destroyed.
In the case of Advanced Gunnery, your objective ship gains a large tactical advantage, even as it becomes a marked target. Of course, this tactical advantage becomes even more meaningful the more dice youre able to train upon your enemies. For example, the objective allows a
Victory II-class Star Destroyer
to fire all six of its front hull zones six attack dice a second time. Thats a significant step up from the three attack dice youd be able to fire from the Star Destroyers left or right hull zone, especially if you didnt have a legal target in either of those zones.
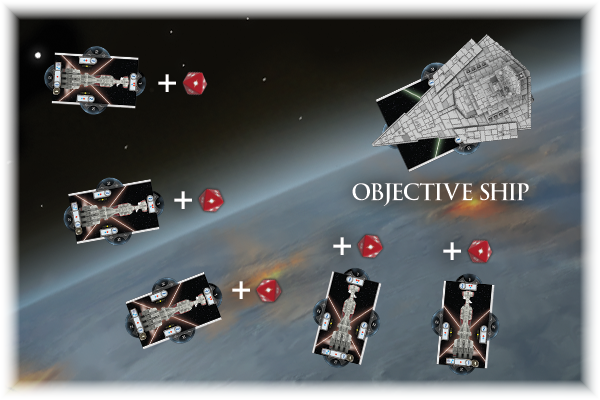
However, because Advanced Gunnery favors ships, like the Star Destroyer, that feature massive armaments, Rebel players may favor Most Wanted, which adds an extra attack die to each attack against an objective ship. Because the Rebellions ships are generally smaller and cost fewer fleet points than the Empires, you can fit more of their ships into an Armada fleet. Then, if you have a fleet with five copies of the
CR90 Corvette A
, the extra dice youll gain from Most Wanted will very quickly add up.
The third of these objectives, Precision Strike, features a victory point value of 15 in its bottom right corner. This means that you score fifteen victory points for each victory token you earn over the course of the game. Thus, rather than rewarding you for eliminating a prized enemy ship, Precision Strike rewards you for repeatedly dealing faceup damage cards to your opponent. This objective may be a good choice for any fleet that can guarantee critical hits, such as one that features
Admiral Screed
, or it could be good for any fleet that uses
Luke Skywalker
and
Dodonna's Pride
to bypass enemy shields and deal faceup damage.
Finally, the Opening Salvo objective adds extra dice to both players opening attacks. At the beginning of the game, each ship is marked with an objective token that it spends on its first attack against another ship. When it spends this token, it gains two attack dice. If its the first players ship, it gains two red attack dice. If its the second players ship, it gains two attack dice of the players choice. However, these extra dice do more than make it easier for you to obliterate your opponents biggest ship; they force you to make an important decision. Will you focus your fire or spread it around to force damage onto each of your opponents ships?
Because Opening Salvo allows you to score half the fleet point cost of each enemy ship that you damage, you can just as easily score the same number of points by damaging two identical ships as you can by fully eliminating one of them. As an example, if you were playing against a fleet with two Victory-class Star Destroyers, that means you could score the same number of points by punching through the one point of rear shielding to land a single damage on each as you could by blasting through all eight hull.
Defense
The four defense objectives are
Fire Lanes
,
Contested Outpost
,
Fleet Ambush
, and
Hyperspace Assault
.
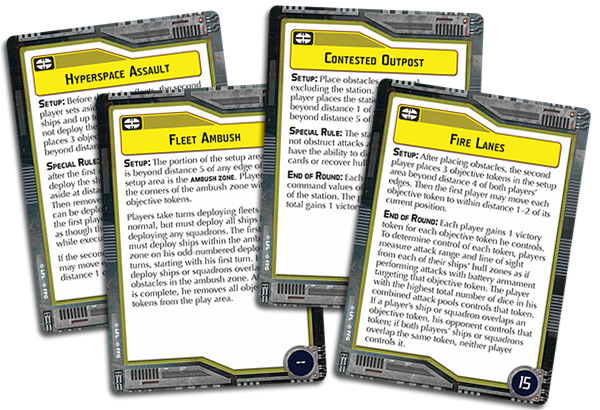
Of these defense objectives, two encourage you to fly toward objective tokens and obstacles in order to win victory tokens, and the other force the first player to respond to tricky adjustments in the deployment rules.
In games featuring the Fire Lanes objective, you can earn victory tokens by positioning your ships to seize control of the games three objective tokens. At the end of each round, you and your opponent compete for control of the objective tokens:
To determine control of each token, players measure attack range and line of sight from each of their ships hull zones as if performing attacks with battery armament targeting that objective token. The player with the highest total number of dice in his combined attack pools controls that token. If a players ship or squadron overlaps an objective token, his opponent controls that token; if both players ships or squadrons overlap the same token, neither player controls it.
Since each objective token is worth fifteen victory points, you could score as many as forty-five points each round by deploying and maneuvering your ships to control these objective tokens. However, that also means that youll likely be maneuvering your fleet in a fashion thats a little reckless and leaves it exposed to your enemy sooner than you might like. For example, its going to be terribly difficult for a Rebels CR90 corvettes and Nebulon-B frigates to wrest an objective token away from an Imperials Victory-class Star Destroyers, and the effort may simply leave you vulnerable to the Imperials guns.
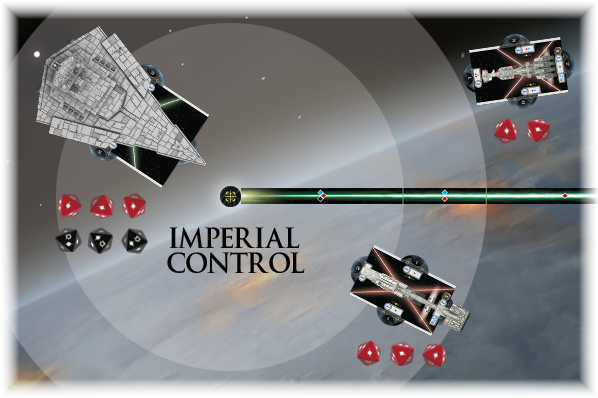
Even with the combined firepower of two Nebulon-B frigates, the Rebel player cant wrest control of the objective token away from the Imperial players single Victory I-class Star Destroyer and its six attack dice.
Alternatively, if a Rebel player manages to bait you into splitting up your Imperial fleet, you may find one of your Star Destroyers exposed to a small swarm of Rebel ships while the other is hopelessly out of range.
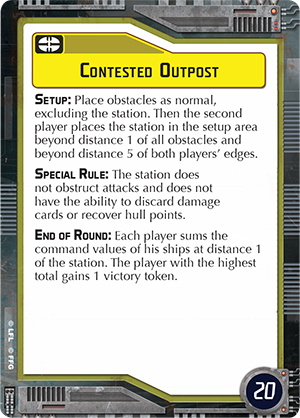
The second defense objective, Contested Outpost, is arguably the most straight-forward of all defense objectives. As with Fire Lanes, the players are encouraged to maneuver their ships in a fashion to win victory tokens; the difference, however, is that Contested Outpost offers twenty points each turn to whichever player is able to count the greatest total command value of all ships within distance 1 of the station. With as many as 120 potential victory points at stake, Contested Outpost encourages players to race into combat at close range. The trick, then, is to make sure that your ships survive long enough to count their command values at the end of the round!
Fleet Ambush doesnt introduce any objective tokens or victory points to change the shape of the game. Instead, it forces the first player to split his fleet in two during the games setup. Normally, all ships must deploy within distance 3 of its controllers edge of the map. However, the setup rules on Fleet Ambush create an ambush zone in the middle of the table, at distance 5 from each edge of the table. Then, the first player must deploy every other one of his ships into this ambush zone, even as the other half must follow the standard deployment rules.
Accordingly, Fleet Ambush immediately impacts the game in two ways. First, it accelerates the game, as the players begin with ships and squadrons closer to firing range from the very outset. Second, it allows the second player to isolate some of the first players ships, leaving them more vulnerable to the second players fleet. Still, even though Fleet Ambush, like all objectives, favors the second player, you might choose to face it as the first player if you feel you can quickly assemble your fleet or use the positioning to your advantage, possibly by racing your Assault Frigate Mark II out of the ambush zone and to the side of your opponents ships.
Finally, Hyperspace Assault allows the second player to set up a deadly flanking maneuver with surprising ease. At the beginning of the game, the second player sets aside one of his small or medium ships and up to three squadrons. These are not deployed during setup. Instead, the second player places three objective tokens in the play area beyond distance 3 of both players edges, and the ship and squadrons that were set aside can enter within distance 1 of any of these objective tokens at the beginning of any round after the first.
This means that as the first player, you have to adjust your strategy and the way you maneuver your fleet. You know that your ships are going to be flanked at some point, but, in the meantime, you have a significant advantage in firepower among the ships in play. Then, if youre running a fleet of Star Destroyers against a Rebel player, you might be willing to risk the flank, guarding your back with a Gladiator-class Star Destroyer, even as you rush your Victory-class Star Destroyers forward toward the bulk of your opponents fleet.

Few Rebel fleets can survive the punishing volleys of a Victory-class Star Destroyer that establishes a solid flanking position.
On the other hand, if youre playing this objective with a Rebel fleet thats facing the possibility of being flanked by a Victory-class Star Destroyer and a trio of TIE bombers, you may want to race your ships out of the area at top speed. The question, of course, is whether or not youll be able to gain any advantage through your adjusted tactics.
Navigation
The four navigation objectives are
Intel Sweep
,
Minefields
,
Superior Positions
, and
Dangerous Territory
.

Three of these navigation objectives encourage players to interact with objective tokens, while the fourth objective, Superior Positions, adjusts the players starting positions and their ships initial trajectories.
At first glance, Intel Sweep appears to favor fast and agile ships. During setup, each player chooses one ship to mark as an objective ship. Then, whenever this objective ship reveals a command dial within distance 1 of one of the games five objective tokens, its owner scores a victory token. Unlike most victory tokens, these arent worth anything on their own, but the player who manages to score the most victory tokens ends up collecting seventy-five victory points at the end of the game.
Still, while the fast, agile ships are best suited to collecting the objectives victory tokens, only one of them can be the objective ship, and since only the objective ship can actually collect the victory tokens, its going to be a heavily favored target. Accordingly, you may actually consider incorporating Intel Sweep into a strategy built around utilizing a fleet of heavy ships that can quickly deal a punishing amount of damage to a single ship and that can simultaneously endure the brunt of whatever your opponent may throw against you.
Meanwhile, players will find it much more difficult to fly their ships safely about the battlefield in any game featuring the Minefields objective. Not only will you have to avoid damaging collisions with obstacles; youll have to avoid the explosive damage of the games six mines. Moreover, since the second player places all the mines, this objective grants him the means to influence the first players flight lanes.
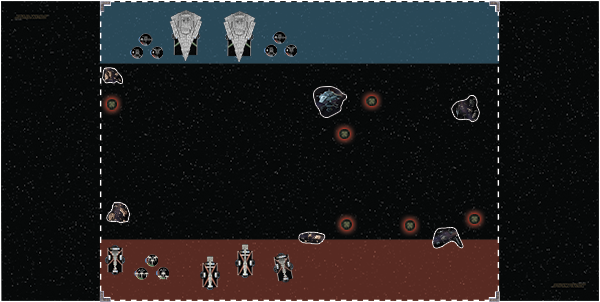
The Imperial player uses the Minefields objective to force the Rebellions ships to engage his Star Destroyers head-on or suffer damage in an explosive minefield.
Conversely, the Dangerous Territory objective rewards the second player for flying into the thick of the games asteroid and debris fields. If this is your active objective, you, as second player, would place one objective token on each of the games obstacles. Then, whenever a ship overlaps an obstacle, its owner can remove the objective token from the obstacle to gain one victory token, each of which is worth fifteen victory points at the end of the game. However, for the first player to win any of the tokens on the asteroid or debris fields, he needs to suffer the obstacles detrimental effects, either taking one faceup damage card or suffering two damage against a single hull zone. As second player, though, you ignore the effects of any asteroid fields or debris fields that your ships overlap, making this objective a good choice not only for anyone planning to navigate the games obstacles to score victory tokens, but also for anyone who would simply prefer to keep obstacles from interfering with his pursuit of enemy ships.
Finally, Superior Positions forces the first player to deploy all of his ships and squadrons before the second player deploys any, granting the second player perfect knowledge of his opponents deployment strategy. If youre the second player, Superior Positions may allow you to line up all your guns on an approach at the side of your opponents fleet, or it may help you get into flanking position where your attacks against the rear hull zones of your enemys ships can help you score victory tokens. And since you score victory tokens for every attack that deals damage, not just for attacks performed by your capital ships, Superior Positions is an excellent objective choice for fleets built around squadrons with the bomber ability.
Meeting Your Objectives En Route to Victory
Unless one player manages to eliminate all opposing ships before the end of the sixth round, the winner of a game of Armada is the player who scores the most points. Many times, you or your opponent will score the majority of those points by destroying enemy ships and squadrons. Each ship or squadron is worth a number of points equal to its fleet cost, as well as the fleet cost of its upgrades.
 You could get thirty-nine points for destroying your opponents
CR90 Corvette B
. Your opponent might score 113 points by destroying the
Gladiator I-class Star Destroyer
that you outfitted with
Admiral Screed
,
Engine Techs
,
Expanded Launchers
, and the
Demolisher
title. Or you might score 120 points by winning all six of the victory tokens available in the Contested Outpost objective.
In Armada, it never hurts to destroy your opponents ships, but its not the only way to win the war. In the end, you must always adjust your strategy to balance your pursuit of enemy ships against against your pursuit of the points you can earn from the objective. In the balance lies victory.
What objectives best suit your style? How would you use them with your favorite fleet? Which would give your fleet the most trouble, and how would you adapt? Share your thoughts with the other members of the Armada community in our forums. The time to deploy your fleet is fast approaching!
Discuss this article
in our forums!
Star Wars: Armada is an epic two-player game of tactical fleet battles in the Star Wars universe. Massive Star Destroyers fly to battle against Rebel corvettes and frigates. Banks of turbolasers unleash torrential volleys of fire against squadrons of X-wing and TIEs. As Rebel and Imperial fleets collide, it is your job to issue the commands that will decide the course of battle and, ultimately, the fate of the galaxy.
© & TM Lucasfilm Ltd.
Source: A Galaxy at War
|
|
|
|
« Last Edit: 23 March 2015, 10:48:30 by RSSFeeder »
|
 Logged
|
|
|
|
RSSFeeder
Global Moderator
Deep One
 
Karma: 0
 Offline Offline
Posts: 3916

|
 |
« Reply #516 on: 23 March 2015, 09:45:04 » |
|
Join the Rebellion (or Empire)
With the release of our first season of Imperial Assault Tournament Expansion Kits comes tournament rules and an FAQ. Whether youre looking to play in a skirmish tournament or just play a campaign with friends, the FAQ is now available on the Imperial Assault page for reference and clarification. For players looking to compete in skirmish tournaments and tournament organizers planning to host them, the tournament rules can also be found on the Imperial Assault page.
Whether youre a player or tournament organizer, be sure to read the
FAQ
(pdf, 3.8 MB) and
tournament rules
(pdf, 726 KB) before getting involved in your first tournament.


A Word from the Developers
Hello Imperial Assault players!
In conjunction with the release of skirmish tournament rules, we are releasing an FAQ to help create the most enjoyable and competitive Imperial Assault experience possible.
The FAQ includes a handful of minor errata to rulebook and card text. Most of these should not change gameplay dramatically and are intended simply to clarify common sense rulings and close exploitable loopholes. For example, we wanted to make sure that when a Massive figure occupies blocking terrain, it is treated the same way a Mobile figure is when it occupies blocking terrain. Similarly, it was important to clarify that walls in combination with a terrain line can enclose a terrain type, to avoid disagreement over whether or not a central square of terrain qualified as difficult terrain or not. Other errata follow a similar vein, clarifying and specifying rather than dramatically altering gameplay.
Our hope with this errata is that it will not affect players day-to-day Imperial Assault experience. But rather, that when these issues come up in a rare instance and need to be addressed, a specific clarification exists and is ready to be referenced.
Good luck, roll well, and may the Force be with you!
Paul Winchester
Fantasy Flight Games
A Word from the Organized Play Team
Greetings Imperial Assault players,
The Imperial Assault skirmish tournament rules are straightforward and share many similarities with the other games we support, particularly X-Wing. Our goal in writing them, as with all of our games, was to make them accessible and easy to adopt so players and tournament organizers can concentrate on the unique aspects of Imperial Assault gameplay.
Organized Play

Thanks Paul and OP!
Download the
FAQ
and
tournament rules
now and begin preparing for Imperial Assault skirmish tournaments. Get started with Spring events at your local store, then try your hand at Regional Championships starting in May!
Discuss this article
in our forums!
Source: Join the Rebellion (or Empire)
|
|
|
|
« Last Edit: 23 March 2015, 10:49:35 by RSSFeeder »
|
 Logged
|
|
|
|
RSSFeeder
Global Moderator
Deep One
 
Karma: 0
 Offline Offline
Posts: 3916

|
 |
« Reply #517 on: 23 March 2015, 09:45:04 » |
|
Escape from Mount Gram
"It was deep, deep, dark, such as only goblins that have taken to living in the heart of the mountains can see through. The passages there were crossed and tangled in all directions, but the goblins knew their way."
J.R.R. Tolkien, The Hobbit
Fantasy Flight Games is proud to announce the upcoming release of Escape from Mount Gram, the second Adventure Pack in the Angmar Awakened cycle for The Lord of the Rings: The Card Game!
Middle-earth is an ancient and storied place, and even such placid locations as the Shire share histories filled with drama, struggles, and warfare. Indeed, long before the Dark Lord ever cared about the Shire or the name of "Baggins," even long before the births of Frodo and Bilbo, Goblin invaders swept down from the mountains and made their way into the Northfarthing before they were turned back in the Battle of the Green Fields, where old Bullroarer Took struck the Goblin leader's head clean off his shoulders with a single blow from his wooden club.
However, no story is ever truly ended while its actors live on, and though the Goblins were routed that day, many retreated to their home at Mount Gram. There, they passed the centuries hidden from the Hobbits and the Rangers of the North. They launched no more invasions of Eriador, but they never shed their evil natures
Now, in Escape from Mount Gram, the Goblins of Mount Gram are once again up to new evils, and when they capture a host of Rangers and heroes, it's up to you and your heroes to lead a daring and dramatic prison break!
Forewarned Is Forearmed
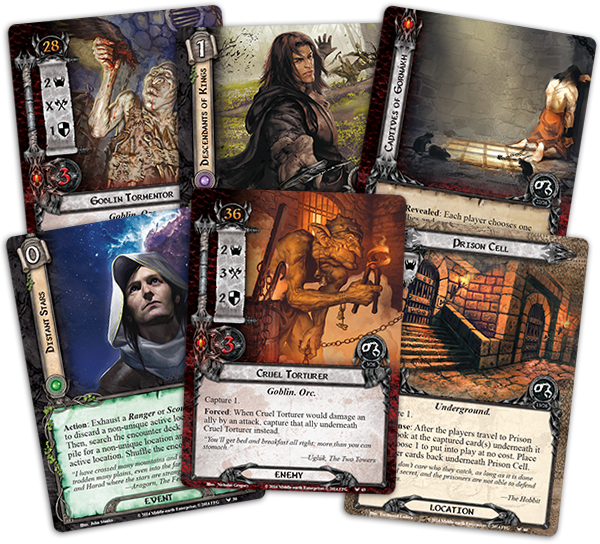
In addition to its new scenario, Escape from Mount Gram introduces a new hero for the Lore sphere and three copies each of nine different player cards. As suggested in the introduction to the Angmar Awakened cycle, these cards explore a variety of different themes, divided among the different spheres of influence. While Leadership players benefit from a pair of cards that encourage direct action against the Enemy, Tactics players gain a pair of Ent-focused cards, and Lore players gain two cards that support a new mechanic based around manipulating the encounter deck and the victory display:
Leave No Trace
(Escape from Mount Gram, 35) and
Keen as Lances
(Escape from Mount Gram, 37).
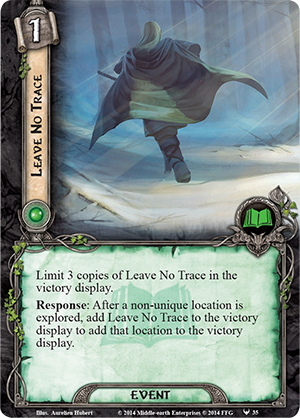 If any of the game's four spheres is built for tricky interactions with the encounter deck, it has to be Lore. Since the Core Set, the Lore sphere has been home to most of the game's draw effects, making it arguably the best sphere for exploring card combinations, and it boasts twice as many cards that target the encounter deck as the next closest sphere, Spirit. These facts make Lore the perfect home for Leave No Trace, which could easily be mistaken as an ineffectual card. Its text reads: "Response: After a non-unique location is explored, add Leave No Trace to the victory display to add that location to the victory display."
For even just one Lore resource, this doesn't initially appear to be a good bargain. Leave No Trace doesn't explore the location, nor even make progress on it. It doesn't cancel the location's effects or allow you to draw cards when the location is explored. It's not even free; you have to pay a resource to trigger it. And to top things off, it comes with the caveat, "Limit 3 copies of Leave No Trace in the victory display." This is only a concern in a multiplayer game, but even so, such explicit limitations are usually reserved for only the most powerful of cards. Black Arrow (On the Doorstep, 15), for example, reads, "Limit 1 per deck."
However, as is now likely obvious, the truth is that Leave No Trace isn't limited to three copies in the victory display because of the impact it mades right when it's played, but because of the power it has to shape the course of the game as it moves toward its conclusion. First of all, in a four-player game, or at any time that you think you might cycle through the encounter deck, Leave No Trace allows you to permanently remove from the encounter deck any locations with nasty "when revealed" effects, Doomed, or Surge. Likewise, it can remove locations with nasty ongoing effects that quickly add up whenever they start flooding into the staging area.
 Still, the card's true power becomes evident as it sets up the sorts of combinations that will become increasingly powerful throughout the Angmar Awakened cycle. For example, each time you play Leave No Trace, you reduce the cost of Keen as Lances by two once for placing Leave No Trace into the victory display and once for placing the non-unique location into the victory display. Once you've played Leave No Trace twice, Keen as Lances costs only one resource; and if there are three copies of Leave No Trace in the victory display, you'll have at least three non-unique locations along with them and your Keen as Lances will be free. Also, if you're playing multiplayer, your teammates' copies of Keen as Lances will also be free. That means that you could each, for zero resources, draw three cards, reduce your threat by four, or add two resources to a single hero.
Of course, we've already seen that other cards from the cycle can manipulate the victory display, such as
Scout Ahead
(The Wastes of Eriador, 9), and we can expect that other cards in the cycle will allow us to transfer our control over the victory display into a greater measure of control over the encounter deck. Accordingly, as we look forward to sending our heroes to aid the Rangers of the North, we can also look forward to some proper scouting. The more we know about the encounter deck and its dangers, the better prepared we'll be to defeat them. Forewarned is forearmed.
Ancient Evils Are Stirring
North of the Shire and north of Bree, ancient evils long gone quiet are stirring once more. Head into the heart of a Goblin stronghold and execute a daring prison break in Escape from Mount Gram. This second Adventure Pack in the Angmar Awakened cycle is scheduled for release early in the second quarter of 2015!
Discuss this article
in our forums!
The copyrightable portions of The Lord of the Rings: The Card Game and its expansions are © 2011 - 2013 Fantasy Flight Publishing, Inc. The Lord of the Rings, and the characters, items, events and places therein are trademarks or registered trademarks of The Saul Zaentz Company d/b/a Middle-earth Enterprises and are used, under license, by Fantasy Flight Games. Living Card Game, LCG, LCG logo and Fantasy Flight Supply are trademarks and/or registered trademarks of Fantasy Flight Publishing, Inc. All Rights Reserved to their respective owners.
Source: Escape from Mount Gram
|
|
|
|
« Last Edit: 23 March 2015, 10:50:20 by RSSFeeder »
|
 Logged
|
|
|
|
RSSFeeder
Global Moderator
Deep One
 
Karma: 0
 Offline Offline
Posts: 3916

|
 |
« Reply #518 on: 23 March 2015, 09:45:04 » |
|
Terror from Above
Blackest, moonless night blinded the Daqan troops as they marched forward. Safety lay just across the field, but on all sides they could see the distant fires of the Uthuk Yllan and hear the shrill whisper of poisoned arrows. Suddenly a screeching filled their ears, followed by the screams of a wounded man and the thud of his body falling on the cold ground. One of the archers rushed over and knelt by his fallen companion. The dying man lay gasping as blood streamed down his face. Claws
death
from above
Fantasy Flight Games is proud to announce the upcoming release of the Razorwings Reinforcement Pack for BattleLore Second Edition.
Those who dwell in the hills of Terrinoth have long dreaded the nocturnal Razorwings, swift batlike creatures who swoop down from their cavernous lairs and bring sudden death to their unsuspecting prey. Now, these vicious beasts join the range of wild creatures that you can harness as part of your BattleLore army. Like the recently announced Mountain Giant and Great Dragon, the Razorwings can by utilized by any faction, but you can channel their relentless ferocity in battle and use it to thwart your opponents.

The Razorwings Reinforcement Pack contains three detailed plastic figures, the cards you need to muster this unit in your army, three new lore cards to customize your lore deck, and a new cavern terrain tile. It also includes a pre-built scenario featuring this new unit and offering unprecedented strategic challenges.
Night Hunters
During the day, Razorwings rarely emerge from the darkness of their caverns. But at night these bloodthirsty creatures speed through the air, ravenously hunting for victims to feast upon. Razorwings ignore the combat and movement restrictions of hexes, soaring easily through forests, over rivers, and above other units on the battlefield. Once a target is within reach, they abruptly descend, tearing and slashing at their prey. A unit of Razorwings can slaughter an entire unit of three health with a single attack and they're still not finished dealing out damage. With their brutal, heavy claws the Razorwings can then stun another nearby unit, rendering that unit motionless and marking them for a future kill.

If you muster Razorwings as part of your army, you can replace a hill on your part of the board with a cavern hex where your Razorwings will lurk. During your Attack step, an ordered Razorwings unit may rush out of the cavern to an adjacent hex and perform an attack. Then, before the attack can be countered, the Razorwings can fly back to their cavern. Once inside, the Razorwings are safe from all non-adjacent units. Because they are able to assault even the most powerful units without fear of immediate reprisal, the Razorwings are among the most efficient and deadly predators of BattleLore.
A Shot in the Dark
The Razorwings Reinforcement Pack includes a pre-built scenario, A Shot in the Dark, that showcases the abilities of these incredibly vicious beasts. Unlike scenario cards, which shape only half of the battlefield, pre-built scenarios shape the entire landscape and create a unique objective for each faction. In A Shot in the Dark, a group of Daqan units must traverse hostile territory, bounded by rivers and Uthuk Yllan on either side. Razorwings also lurk in the hills, eager for fresh victims. It will take several days for the Daqan to reach safety, and at night, the Razorwings come out of their cavern to hunt.

The scenario alternates between day and night each turn. Every night the Razorwings reappear with full heath and attack, every day the Daqan regain the upper hand and move forward, striving to eliminate any opponents they can find. The goal for the Uthuk Yllan, with the help of the Razorwings, is to kill as many Daqan troops as they can. The Daqan seek to reach the safe haven that lies across the battlefield, and to rid this region of the rapacious Razorwings that menace its people. If they can accomplish either, they will achieve victory.
Unleash the Terror
Deploy Razorwings in your Daqan forces together with the massive Roc Warriors or alongside the Siege Golem of the Hernfar Guardians Army Pack in order to terrorize the Uthuk Yllan from the skies. Or, match Razorwings with the burrowing Doombringer of Warband of Scorn in your Uthuk Yllan army, so that you can threaten the Daqan simultaneously from both above and below. Whichever faction you play, the Razorwings savage and sudden assaults will fill your enemies hearts with fear.
The Razorwings Reinforcement Pack will be available in the second quarter of 2015. In the meantime, visit the BattleLore Second Edition website for more information and details about other upcoming expansions.
Discuss this article
in our forums!
The copyrightable portions of BattleLore Second Edition are © 2013 Fantasy Flight Publishing, Inc. BattleLore is a registered trademark of Fantasy Flight Publishing, Inc.
Source: Terror from Above
|
|
|
|
« Last Edit: 23 March 2015, 10:51:32 by RSSFeeder »
|
 Logged
|
|
|
|
RSSFeeder
Global Moderator
Deep One
 
Karma: 0
 Offline Offline
Posts: 3916

|
 |
« Reply #519 on: 23 March 2015, 09:45:04 » |
|
High Risk, High Reward
Traveling through hyperspace isnt like dusting crops, boy!
Han Solo
Smuggling is a high risk, high reward line of work. In exchange for the freedom to enjoy the open skies and the money it takes to survive, Smugglers willingly undertake dangerous, sometimes illegal, jobs with employers that can be capricious and unsavory. Every leap into hyperspace, every approach to a planet, every interaction with a buyer or seller is full of risk.
Available now at local retailers and in our online store, the Fly Casual sourcebook for Star Wars®: Edge of the Empire features new guidelines to help GMs add more risks (and a few rewards) to Smuggling adventures. These include expanded rules on hyperspace travel and details for how to run quick-draw showdowns. In today's article, developer Max Brooke provides an overview of these integral aspects of any Smugglers tale. We'll also touch on how GMs can help a group of Smugglers find work and eventually determine how much they should get paid.
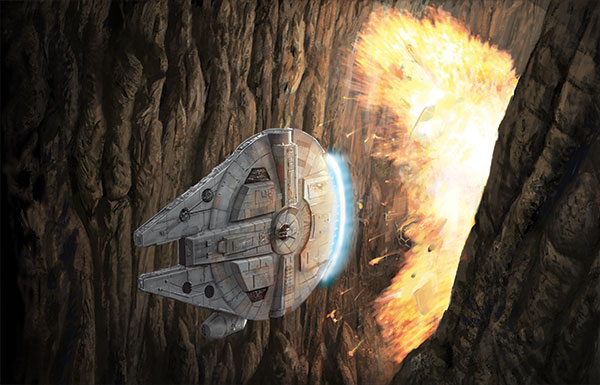
Making the Jump
Here's Max:
Thanks to the miracle of the hyperdrive, space ships can soar between the stars with astounding speed, completing journeys that once could have taken millennia in a matter of days. However, thanks to shifting hyperlanes, complexities introduced by mass shadows, and countless other factors, jumps across the interstellar void are far from safe. The calculations involved are enormously complex. Even the slightest error can mean the death of everyone aboard.
Fortunately for PCs and GMs, Fly Casual provides guidance on how to make Hyperspace Travel exciting without bogging down the game. New modifiers for the Astrogation check factor in the circumstances of departure and the route. Expanded options are given for spending advantage, triumph, despair and threat results on these checks, and a list of travel times is provided for many of the galaxys most common trading lanes and smuggling routes. Astrogation checks with sufficient advantage or threat can get the travelers to their destination early or help chart new hyperlanes, while threat and despair on the check can cast the ship adrift in uncharted space or even cause a collision with a mass shadow. Any jump is slightly dangerous, but a good Pilot backed by a skilled crew can take advantage of secret routes and shortcuts to arrive ahead of schedule or where the Imperials least expect it.

Quick Draws
Showdowns are an important part of the Star Wars mythology, and Fly Casual provides GMs with the resources for quick-draw duels. These rules provide additional options for combatants squaring off in a showdown, from the moment the parties involved begin to size up and intimidate each other to the thrilling point when someone draws and shoots. A showdown can be added to the beginning of a longer battle or be used for a conflict that ends after a single shot. While these rules are especially useful alongside characters with the new Gunslinger specialization, GMs should find them useful when crafting all sorts of Smuggler stories.
Thanks, Max!

Finding Work and Getting Paid
Beyond the expert flying and the shootouts, a smuggling job begins with the search for work and ends only when you get paid or when you dont. Fly Casual therefore offers suggestions for GMs about how to make the beginning and end of a job just as suspenseful and action-packed as the middle. A smuggling job might begin with characters meeting an underworld contact in a seedy location, receiving a coded transmission from the Rebel Alliance, or discovering that an old friend could use a little help.
With solid skills, a good crew, and a little luck, youll be able to deliver your cargo to its buyer intact and on time but getting paid for your delivery is an adventure in itself. Your pay may very well depend on a Negotiation check, so Fly Casual includes a table of Payout modifiers that helps translates the results of that check into credits or cargo rewards. Of course, you may fail to deliver the goods you promised when you promised them, so there are also options for what to do when the cargo arrives late or in an undesirable condition. In the worst case scenario, a team of Smugglers may have to face the wrath of their employer empty-handed. Fly Casual gives some ideas about what to do if that happens, from staging a shootout to deepening an Obligation, and how to keep the story moving forward to the next, hopefully more successful, smuggling job.

Shoot Faster and Fly Better
Travel through hyperspace is almost inevitable on a smuggling job, and blaster duels are common in this line of work especially when a deal goes bad. With the new guidelines introduced in Fly Casual, your Edge of the Empire gaming group will be able to find a job, speed through the stars, draw quickly, shoot first, and, in the end, get paid.
Pick up your copy of Fly Casual today!
Discuss this article
in our forums!
Participate in grim and gritty adventures on the fringes of the Star Wars universe with Star Wars®: Edge of the Empire. Edge of the Empire is a complete standalone roleplay system that transports players to some of the shadiest locations in the Outer Rim, the underbelly of the Core Worlds, and everywhere else in-between!
© and Lucasfilm Ltd.
Source: High Risk, High Reward
|
|
|
|
« Last Edit: 23 March 2015, 10:53:13 by RSSFeeder »
|
 Logged
|
|
|
|
RSSFeeder
Global Moderator
Deep One
 
Karma: 0
 Offline Offline
Posts: 3916

|
 |
« Reply #520 on: 23 March 2015, 18:45:10 » |
|
Strongholds of Resistance
And now, your highness, we will discuss the location of your hidden Rebel base.
Darth Vader
Fantasy Flight Games is proud to announce the upcoming release of Strongholds of Resistance, a sourcebook for the Star Wars®: Age of Rebellion roleplaying game!
Strongholds of Resistance takes you to worlds that have boldly revolted from Imperial control and to the secret bases which serve as the command centers of the Rebellion. Your team of Rebel operatives might visit several of these locations in your work for the Rebel Alliance, or embark on a series of adventures amid the conflicts and challenging terrain of a single planet. Game Masters can easily integrate these new locations in their ongoing campaigns using the included modular encounters, or even launch a fresh campaign focused on worlds that are actively resisting the evil Empire or on the war efforts of a specific Rebel base.

Worlds in Revolt
In the Galactic Empires early days, Imperial agents and stormtroopers ruthlessly cracked down on any world that balked at Imperial rule. However, as some attempts to silence dissenting voices failed, other victimized planets began to express their discontent, particularly in the Outer Rim. Many planets have spawned local resistance groups, but not all such groups become part of the Rebel Alliance. And while thousands of worlds may sympathize with the Rebels and even provide support to the Rebellion, only a few hundred worlds have dared to openly resist the Empire.

A diplomatic mission might take you to the core world of Chandrila, a founding member of the Rebel Alliance and a center for poltiical debate, democracy, and peaceful protest. Or you may be sent to smuggle technology and weapons out of officially neutral planet Sullust. On Mon Cala you might swim through the planets submerged capital city and negotiate deals on capital ships that can swiftly transport starfighters and Rebel troops to the site of the next battle. Strongholds of Resistance describes multiple locations and adversaries for not only these three worlds, but also several others, ensuring an immense variety of possible adventures on a range of planets.
Hidden Rebel Bases
The Rebellion may be fueled, armed, and legitimized by openly dissenting worlds, but the true bases of its operation are in locations scattered throughout the galaxy, kept secret from the Empire at all costs. In the bustling corridors of these bases new recruits are trained, strategies are formulated, troops are mustered, and the wounded are healed. You may be charged with ensuring that a base remains secret from encroaching Imperial spies, with diffusing tensions among the Rebel leadership, or with organizing a high-risk mission on a nearby planet. No matter what your assignment, youll have to perform it in close confines and under the constant threat of sudden Imperial discovery.
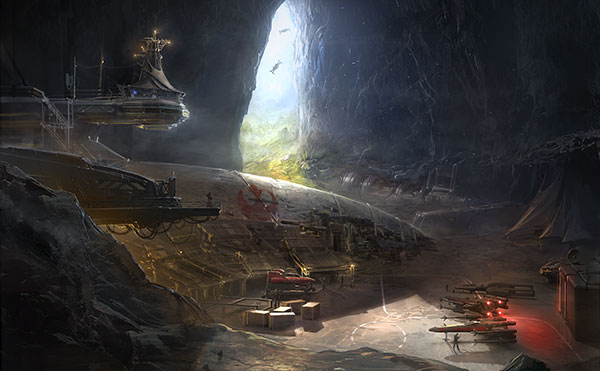
Strongholds of Resistance introduces four Rebel bases and includes suggestions for integrating them into your campaigns, or even creating your own hidden outpost. Each base has its own focus: Polis Massa is a center of espionage, starfighter support, and medical research. The Defiant Core base, constructed out of a salvaged Star Destroyer from the Clone Wars, is dedicated to hindering Imperial forces and exposing their abuses. Tierfon is a smaller base focused on keeping its starfighters operational. Finally, in the frigid wastelands of Hoth lies the most important and expansive base of all Echo Base, the current headquarters for the entire Rebellion.
Native Strengths and New Adaptations
Naturally, some members of the species native to Alliance worlds may be recruited into the Rebellion. Strongholds of Resistance therefore introduces playable species from Mon Cala, Polis Massa, and the Roche asteroid field: the proud and belligerent Quarren, the peaceful and telepathic Polis Massans, and the technophilic, communal Verpine. Each species offers a unique set of abilities and brings their own story of Imperial rule and open dissent to the Rebel Alliance.

The new species of Strongholds of Resistance: A Polis Massan, a Quarren, and a Verpine
Players and GMs will also find in this sourcebook a panoply of new gear and vehicles from repair droids to a cloaking-enabled starfighter. Some of the new gear is species-specific: Polis Massans, since they lack vocal chords, may want to purchase artificial ones. Verpine bond gauntlets mimic that species exoskeleton and help the wearer perform delicate tasks. Other gear is designed to help you navigate foreign planets. If your adventures take you to watery Mon Cala, you may want some organic gills so that you can breathe underwater, or you may find yourself traversing the bottom of the ocean in an Explorer submersible.

Defy the Empire
The war against the Empire has as many fronts as the galaxy has planets. You never know where your missions for the Rebel Alliance will take you, who you'll encounter, or what will be the location of your next home base. With the new settings, adversaries, character options, and gear introduced in Strongholds of Resistance, the possibilities are endless.
You can explore these realms of Rebel dissent in the second quarter of 2015. Until then, look for upcoming previews and current news on the Age of Rebellion website.
Discuss this article
in our forums!
Source: Strongholds of Resistance
|
|
|
|
« Last Edit: 23 March 2015, 19:13:47 by RSSFeeder »
|
 Logged
|
|
|
|
RSSFeeder
Global Moderator
Deep One
 
Karma: 0
 Offline Offline
Posts: 3916

|
 |
« Reply #521 on: 03 July 2015, 11:45:13 » |
|
Let the Galaxy Burn
So boundless was his hatred, so great was his rage, that he would have killed them all without mercy. At that moment, he knew he would fight forever. He would fight until all was ruination and the entire galaxy burned.
Warhammer 40,000
A magnificent bloodbath awaits you in Forbidden Stars. The Herakon Clusters teeming populations are ripe for slaughter, their veins coursing with fresh crimson blood for the Blood God, their skulls ready to adorn his throne. More gloriously, the servants of the Imperium, the Eldar, and the Orks are also invading the sector, offering you an unprecedented opportunity to unleash your hatred, exterminate your foes, and leave a trail of misery and ruin in your wake.
Today's preview is focused on the bloody and savage World Eaters Chaos Space Marines. Youll learn about this factions hate-filled forces and hellforged starships, its diabolical use of the Warp, and how the powerful and eternal lure of Chaos increases your military might.
Lure of Chaos
The most omnipresent soldiers of Chaos are Cultists, drawn to the powers of darkness by promises of glory and violence. Armed with primitive weapons, Cultists can nevertheless overwhelm a superior foe though the sheer weight of their numbers, and may possess fearsome gifts from the Chaos Gods: muscles of steel, flailing tentacles, sharp, poison-dripping horns.
You enter the Herakon Cluster with two units of Cultists, each as formidable as a unit of Ultramarines Scouts. But Chaos and its vices are so enticing that Cultists rapidly proliferate. The
Prophets and Signs
Event Card brings one more Cultist, if not two more, to your army. In combat, you can play Dark Faith to gain
 from your forces devotion to the Dark Gods and possibly gain another Cultist unit. So, too, the Lure of Chaos offers you the chance to gain another Cultist who brings two
 or
or
 to the fight. You can also spread your Cultists throughout the sector and occupy uncontrolled worlds whenever you issue a Dominate Order.


Should you seek to unequivocally conquer a void, you may use Lure of Chaos to add another Iconoclast Destroyer to your fleet. These compact ships carry a formidable arsenal of weapons for their size and have been known to quickly shatter a planets orbital defences. Detested by the Imperium, Iconoclast Destroyers can as easily obliterate an enemy unit as they can convey your ravenous forces to the battlefront.
The Forces of Darkness
The heart of your armies are the Chaos Space Marines themselves, the World Eaters known for their peerless military prowess and the extreme delight they take in spilling blood for Khorne. Their hunger for killing fuels their excellence in battle: a unit of these blood soaked Berzerkers rolls one more die than a unit of their most hated foes and former breathren, the Space Marines.
As Chaos inevitably gains more power in the Herakon Cluster, you can purchase towering, crazed Helbrutes that unite the firepower of small tanks with the minds of psychotic maniacs. These armoured, rampaging monstrosities must be chained when not fighting and released only in battle to destroy everything they encounter. Yet Chaos Reaver Titans loom even more terrible than the Helbrutes. These ancient, indomitable war engines are the most powerful unit of the World Eaters faction, consecrated to the Chaos Gods and determined to perform all manners of butchery and destruction. Chaos Reaver Titans are so fearsome that lesser devotees of Chaos offer up sacrifices, even give their own lives, to help quench their thirst for bloodshed.

As Chaos Titans and Helbrutes storm the land, Repulsive Grand Cruisers bring terror to the void. These rare, gargantuan ships can withstand copious damage and launch bright torrents of deadly fire at enemy ships or vulnerable planets. Long ago manufactured to serve the Imperium, these ships are now among the most dreaded vessels of Chaos, able to eradicate tens of thousands of lives within a few seconds.
Boundless Hate
Since the massive schism of the Horus Heresy, Chaos Space Marines have fought an eternal war, fueled by boundless hatred, unquenchable rage, and an unrelenting desire to exact vengeance. These black internal drives combine with inhuman mutations and murderous technology to grant the World Eaters incredible abilities in war. The combat card Inhuman Strength grants your armies additional
 and
and
 in combat. If that strength is feeding a Helbrute or Grand Cruiser, it may cannibalize one of your units in order to wreak even greater destruction upon the enemy.

The implacable thrill of spreading bloody death and nightmarish despair throughout the galaxy also spurs on the forces of Chaos in battle. Death and Despair, one of the most powerful combat cards in the World Eaters faction, enhances your
 and
and
 , and allows you to ruthlessly eliminate any number of your enemies lower command level units on top of whatever other damage you deal. With a Chaos Titan or Grand Cruiser in the fray, this card manifests your
 in the destruction of another enemy unit. Even the already defeated cannot escape the World Eaters wrath.
Lords of the Warp
Having long ago given themselves to the service of the Blood God, the World Eaters Chaos Space Marines have no dread of the Warps swirling and uncanny abyss. Of all the factions in Forbidden Stars, they alone can utilize the Warp for their own benefit. By playing a
Prayer to the Dark Gods
, you can undo how another player has moved a Warp Storm, instead shifting it in whatever direction best suits your violent aims.
From the Warp
, an order upgrade card, grants you the singular ability to move ships through Warp Storms once per turn. Similarly, the event card
Through the Warp
enables you to move an entire attacking army through a Warp Storm and increase
 in the process. These cards will instill permanent dread in your opponents who thought that, surrounded by Warp Storms, their forces would remain secure. The World Eaters respect no boundaries and are limited only by their infinite cruelty, malice, and hate.
Kill, Maim, Burn
As the commander of the World Eaters, you have chosen obscene freedom and bloody gratification in the place of righteous servitude. Only war remains for you, only the incredible power of inflicting pain upon others, of soaking the ground with their blood, burning what they cherish. The Herakon Cluster is yours: all you have to do is kill, maim, and burn anyone and anything that stands in your way.
Let the galaxy burn. Pre-order Forbidden Stars from your local retailer today.
Discuss this article
in our forums!
Forbidden Stars © Copyright Games Workshop Limited 2015. Forbidden Stars, the Forbidden Stars logo, GW, Games Workshop, Space Marine, 40K, Warhammer, Warhammer 40,000, 40,000, the Aquila Double-headed Eagle logo, and all associated logos, illustrations, images, names, creatures, races, vehicles, locations, weapons, characters, and the distinctive likeness thereof, are either ® or TM, and/or © Games Workshop Limited, variably registered around the world, and used under license.
Source: Let the Galaxy Burn
|
|
|
|
« Last Edit: 03 July 2015, 12:43:54 by RSSFeeder »
|
 Logged
|
|
|
|
RSSFeeder
Global Moderator
Deep One
 
Karma: 0
 Offline Offline
Posts: 3916

|
 |
« Reply #522 on: 03 July 2015, 11:45:13 » |
|
Taking the Black

Under the wounded pride, Will could sense something else in the older man. You could taste it; a nervous tension that came perilous close to fear.
George R.R. Martin, A Game of Thrones
Fantasy Flight Games is proud to announce Taking the Black, the first Chapter Pack in the Westeros cycle for A Game of Thrones: The Card Game Second Edition!
As A Song of Ice and Fire begins, King Robert Baratheon rides north to visit his old friend Eddard Stark in Winterfell. Westeros is at peace. But this deceptive calm will not long remain. Already, the seeds of unrest are growing with the ambitions of House Lannister, with the wedding of Daenerys Targaryen to a Dothraki khal, with the apparent murder of the Hand, Jon Arryn. Conflict between the Great Houses looms on the horizon as the high lords and ladies of Westeros begin to play their game of thrones.
You can take your place at the very beginning of the story with Taking the Black, the first Chapter Pack in the Westeros cycle for A Game of Thrones: The Card Game. As part of the Westeros cycle, Taking the Black explores the first chapters of A Game of Thrones with iconic characters like Renly Baratheon, the Hound, and Maester Luwin entering the game for the first time. In Taking the Black, each faction begins its journey through A Game of Thrones towards the Iron Throne!
For more on Taking the Black and the entire Westeros cycle, we turn to the designer of A Game of Thrones: The Card Game, Nate French.

Nate French on the Westeros Cycle
The Westeros cycle (that title is an homage to the first CCG base set) is the first expansion to the second edition of A Game of Thrones: The Card Game, and we tried to draw heavily from the events of the first book in A Song of Ice and Fire. Naturally, this doesnt mean that everything in these Chapter Packs is tied to the first book, but wherever possible, we turned to the beginning of the series for inspiration. (Dont worry Martell and Greyjoy fans those factions werent prominently featured in the book, but all factions get equal treatment in the cycle.)
As this is the first cycle, our primary design goal was to expand the possibilities of the Core Set without adding additional rules to the game. At a very basic level, there are two types of cards that youll find in the Westeros cycle: cards that easily slot into a core deck, and cards that pull a players understanding of a core theme in a new direction.
Another important design goal of the set was to rapidly increase the number of plot cards in the environment. Constructing and piloting a plot deck is one of the most enjoyable aspects of A Game of Thrones, and we felt that investing heavily in new plot cards would rapidly increase the strategic scope of the game. This cycle introduces eighteen new plots to the game, including a loyal plot for each faction. Each of these loyal plots like
For the Watch!
supports its factions core strategies, inviting players to further embrace each factions unique playstyle.
Working on this set and the young, second edition card pool was a lot of fun, and Im looking forward to seeing these cards influence the early metagame.
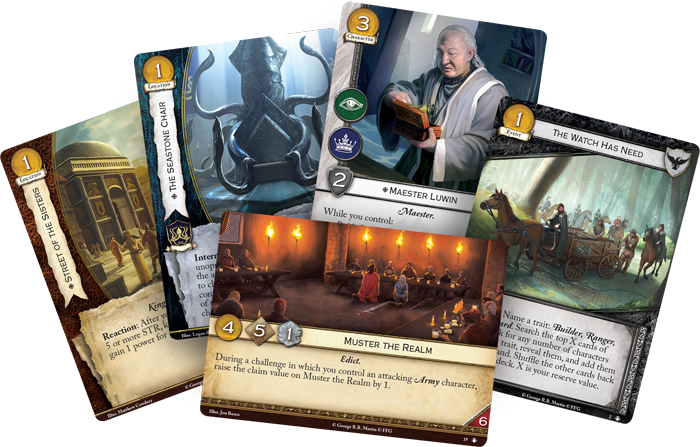
Join the Watch
Recently, we previewed the Nights Watch faction in the second edition of A Game of Thrones: The Card Game. More than any other faction, the Nights Watch relies on defense.
The Wall
(Core Set, 137) grants additional power when you oppose every challenge, and powerful characters like
Old Bear Mormont
(Core Set, 126) can bring other Nights Watch characters into play, provided you havent lost a challenge as the defending player.
The exception to the Watchs focus on defense are its Rangers. They walk the lands beyond the Wall, gathering information and scouting for possible threats to the Watch. In the prologue of A Game of Thrones, the first characters you encounter belong to the Nights Watch, so it only makes sense that the first character you see in Taking the Black is one of these Nights Watch Rangers:
Will
(Taking the Black, 1). Will bears both the military and intrigue challenge icons, as well as two important keywords. Stealth allows Will to choose an opponents character who cannot defend the challenge, and insight invites you to draw a card if you win the challenge.
This combination of challenge icons and keywords can be formidable, especially for only four gold, but Will is not without drawbacks. The Rangers of the Watch accomplish nothing if enemies still get past the Wall. Because of this, Will also bears a Forced Reaction: After you lose an unopposed challenge, sacrifice a Ranger character you control. In other words, as long as you have a defender to oppose every challenge, Will is free to sneak by your opponents characters and learn their plans. As soon as enemies begin to slip by you, however, Will can quickly become a liability that must be sacrificed for the greater good.
Will isnt the only card the Nights Watch gains in Taking the Black. These defenders of Westeros also gain an event that allows you to gather new recruits wherever you find them. You can swell your hand with new brothers for the Nights Watch by playing
The Watch Has Need
(Taking the Black, 2). Playing this event allows you to name a trait: either Ranger, Steward, or Builder. Then, you may search a number of cards from the top of your deck equal to your plots reserve value, and add all cards that bear the named trait to you hand.
In many ways, playing The Watch Has Need can help you shore up any weaknesses in the strengths of the Nights Watch. Each of the three branches of the Nights Watch Rangers, Stewards, and Builders loosely corresponds to the three challenge icons: military, intrigue, and power. Because of this, if you desperately need more characters with the intrigue icon, you may name Steward, whereas if youre short on military icons, you may choose Ranger. Its also important to consider the reserve of your plot when you play the card.
Counting Coppers
(Core Set, 10) allows you to search ten cards for your recruits, but offers little gold to play them.
A Feast for Crows
(Core Set, 2), on the other hand, only allows you to search four cards, but gives you enough gold to play even the most expensive characters.
Say Your Vows
Taking the Black begins the Westeros cycles journey through the first book of A Song of Ice and Fire with powerful new cards for every faction. You range the lands beyond the Wall with Will and the Nights Watch, journey to the Dothraki city of Vaes Dothrak, or sit the Seastone Chair with the Lord Reavers of House Greyjoy. Begin the story of A Game of Thrones anew with the first Chapter Pack for the second edition!
Look for Taking the Black at your local retailer in the fourth quarter of 2015.
Discuss this article
in our forums!
The copyrightable portions of A Game of Thrones: The Card Game Second Edition is © 2015 Fantasy Flight Publishing, Inc. Licensed by George R.R. Martin. The names, descriptions, and depictions applied to this game are derived from works copyrighted by George R.R. Martin, and may not be used or reused without his permission. A Game of Thrones: The Card Game Second Edition, its expansion titles, Living Card Game, LCG, the LCG logo and Fantasy Flight Supply are trademarks and/or registered trademarks of Fantasy Flight Publishing, Inc. All rights reserved to their respective owners.
Source: Taking the Black
|
|
|
|
« Last Edit: 03 July 2015, 12:45:00 by RSSFeeder »
|
 Logged
|
|
|
|
RSSFeeder
Global Moderator
Deep One
 
Karma: 0
 Offline Offline
Posts: 3916

|
 |
« Reply #523 on: 03 July 2015, 11:45:13 » |
|
The Archmage's Attaché
"All conjectures about him were spiced with references to the bygone magic of Old Whateley, and how the hills once shook when he shrieked the dreadful name of Yog-Sothoth in the midst of a circle of stones with a great book open in his arms before him."
H.P. Lovecraft, The Dunwich Horror
As we've seen in our earlier previews of the ninth deluxe expansion for Call of Cthulhu: The Card Game, The Thousand Young, its 165 new cards (three copies each of fifty-five different cards) greatly expand the hosts and powers of Shub-Niggurath, the Black Goat of the Woods and Mother of a Thousand Young. However, we've also seen how it houses arcane secrets of every kind within the new Locations it introduces, and these secrets give power and support to each of the game's other factions. Today, we continue our exploration of what The Thousand Young offers to players with a look at its Champion Card,
The Archmage's Attaché
(The Thousand Young, 37).
2013 North American Champion Tom Capor on The Archmage's Attaché
No player has had a greater impact upon the shape of Call of Cthulhu: The Card Game than four-time World Champion Tom Capor. For years, his name has been synonymous with top-level play, including an unbroken string of victories at Gen Con Indy that date back to 2009 when the convention was the site of the game's World Championships.

However, it's not just his name and his results that have become synonymous with the game; because the game's World Champions earn the right to work with the developers to design their own cards, Tom has added to the game's card pool, as well.
The Mage Known as Magnus
(That Which Consumes, 111),
Hall of Champions
(Written and Bound, 20), and
The Mage's Machinations
(Terror in Venice, 30) are all his design, as is The Archmage's Attaché, which appears in The Thousand Young and which he earned the right to design by winning the 2013 North American Championship, once again at Gen Con Indy, the home to so many of his biggest victories.
"Today, I have the distinct pleasure and honor to show off The Archmages Attaché!
 "If there was one thing that Lovecraft's stories and I have in common, it would be our attachment to strange objects. For almost the entirety of my tabletop gaming career, Ive been lugging around a briefcase. In the older times, we didnt have all these fancy ways to carry around decks and other gaming bits that we do now, so while most were transporting their cards in their assorted boxes, binders, and book bags, my solution to the problem was the briefcase.
"However, as I continued to attend events and tournaments, the briefcase became more than just an efficient way to carry my things. It became an ice breaker, and it became my symbol. It showed that I was serious, but didnt take myself too seriously. I mean, come on, who brings a briefcase to a card game?
"Personality quirks aside, when I earned this opportunity to birth a card into Call of Cthulhu: The Card Game, and after I had already briefly hinted at the briefcases presence in The Mages Machinations, it became clear to me that the briefcase should be the feature of my attachment card. When played, The Archmage's Attaché attaches to a deck and then 'opens' as an action, revealing the top card of that deck, and allowing you to play it as your next action, ignoring resource matching.
"In the spirit of flavor, The Archmages Attaché carries a lot of potential, adds a lot of choices, and allows you to pack more opportunities to react to the current game state. On one side, you have your own deck. You know what it is trying to do and the Attaché will help you get there faster. On the other, if you can correctly piece together your opponents' strategies, the Attaché might allow you to utilize or disrupt their options, as well. Herein lie the two major ways to play The Archmage's Attaché.
Your Stuff Versus My Stuff
"Its all good stuff, but in order to determine whether you'll get more value out of the Attaché by attaching it to your deck or your opponent's, you'll need to take into account cost curves, card types, synergies, and various other factors. The choice will force gamers to really stretch their analytical muscles
and I like that.
"The safer choice is always attaching the Attaché to your own deck. After all, you know what to expect out of your deck. In this case, the Attaché acts as a faux draw engine, and it comes at a relatively cheap price.

In this example, we've attached The Archmage's Attaché to our deck. Exhausting it during our operations phase reveals
Garden District
(The Thousand Young, 49), which we can now play as our next action if we choose. Because cards played by The Archmage's Attaché ignore resource matching, we not only gain the "false draw" it offers, but an extra economic efficiency since we can pay for it with our open domain that contains just one Miskatonic Resource, rather than needing to spend the Silver Twilight resource that exists only in our open domain with three resources.
"Of course, there's also the risky choice: attaching the Attaché to your opponents deck. Due to the nature of most decks, youll have a use for most of your opponents cards. After all, most of them will be attempting to do the same thing as you, in a different shape. They'll have characters, events to surprise you, and supports to reinforce their positions. However, many decks may also include a hodgepodge of cards that are completely uselessness to you, especially niche decks that dont conform to typical standards. Still, while there's a chance that you'll reveal
The Seventy Steps
(In Memory of Day, 30) after your opponent has already won a story or a copy of a unique character your opponent already controls, there's also a chance that The Archmages Attaché will present you with the unique opportunity to let you utilize your opponent's most critical cards against him, using them to advance your strategy, or simply using them to keep your opponent from advancing his. Good times either way.
In this example, we take the riskier play with The Archmage's Attaché, attaching it to our opponent's deck. Now, when we exhaust the Attaché, it reveals our opponent's
Nyarlathotep
(The Thousand Young, 36), which we cannot afford to play, meaning our use of the Attaché was "dead" for this round. However, had we been able to play Nyarlathotep, we could have potentially denied our opponent the use of one of his most powerful unique characters, likely disrupting more than one element of his overall strategy.
"Your deck, or your opponent's. Which will you choose?
My Thanks
"Id like to thank FFG for this amazing opportunity and Damon Stone for his patience, wisdom, and his help in bringing The Archmages Attaché to life. Of course, I also wish to thank the Cthulhu community for your continued support and hope that all can enjoy this little gem of an attachment card."
Thanks, Tom!
Throughout the years, Tom has proven his mastery of the eldritch secrets of Call of Cthulhu: The Card Game, so it stands to reason that The Archmage's Attaché will be packed full of all manner of tricks, and it's likely to hold more than just your cards or your opponent's. With all the possibilities it contains, The Archmage's Attaché may very well open a gateway to an alternate reality, or it may hold the secret to crossing the boundaries of time and space.
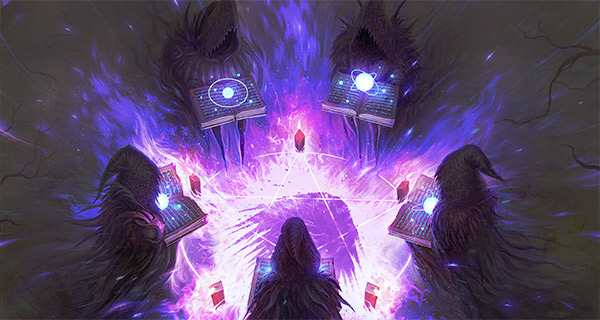
A Thousand Terrible Secrets
The Archmage's Attaché is just one of the many new cards coming in The Thousand Young, and all of them introduce new abilities and deck-building possibilities. In fact, The Thousand Young is something like a briefcase full of cards, itself, containing tools and answers for nearly every strategy. How will you make use of them? You'll soon have the chance to decide. The Thousand Young is scheduled to arrive at retailers later next week!
Discuss this article
in our forums!
The copyrightable portions of Call of Cthulhu: The Card Game are © 2008 - 2013 Fantasy Flight Publishing, Inc. Call of Cthulhu is a registered trademark of Chaosium, Inc. Living Card Game, LCG, LCG logo and Fantasy Flight Supply are trademarks and/or registered trademarks of Fantasy Flight Publishing, Inc. All rights reserved to their respective owners.
Source: The Archmage's Attaché
|
|
|
|
« Last Edit: 03 July 2015, 12:46:04 by RSSFeeder »
|
 Logged
|
|
|
|
RSSFeeder
Global Moderator
Deep One
 
Karma: 0
 Offline Offline
Posts: 3916

|
 |
« Reply #524 on: 03 July 2015, 20:45:16 » |
|
Charge into Battle!

Muster your armies, stake out your position, and charge into the fray! BattleLore: Command  for iOS and Android is now on sale at the price of $3.99! Based on the hit board game BattleLore Second Edition, BattleLore: Command offers you the chance to lead fantastical armies in intense tactical combat scenarios. The single-player campaign places you in charge of the noble Daqan army as they defend their homeland against the invasion of the ravaging, bloodthirsty hordes of the Uthuk Yâllan. In multiplayer, you can command an army of either Daqan or Uthuk Yâllan units and wage war against opponents from anywhere in the world. Both the iOS and Android versions feature intuitive touch-screen controls, cross-platform online multiplayer, and a 360º zoom view that allows you to see the battlefield from almost any perspective.Â

Fearless Warriors and Ferocious InvadersThe land of Terrinoth has long flourished in peace, its people making a living from farming, herding, and hunting. Now, the Uthuk Yâllan, a vicious, demon-blooded people from the desert wastelands, have sent their savage forces to invade, occupy, and lay waste to Terrinoth. The single-player campaign of BattleLore: Command puts you in charge of fighting against this terrible Uthuk Yâllan invasion. Youâll have to keep them from burning villages, stealing powerful magics, and conquering important fortresses if you want to win. As you prove your skills as a commander, more forces will come to fight under your banner, until you can field an army of not just infantry, archers, and cavalry, but even enchanted stone Rune Golems and giant, soaring raptors.Â
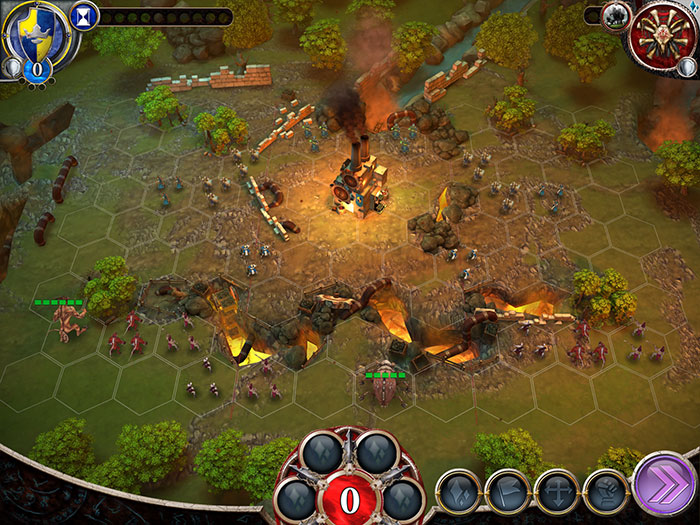
Multiplayer mode lets you undertake vicious tactical duels against an online opponent from anywhere in the world. For every battle youâll select a challenging scenario, determine how much you and your opponent can spend to muster your forces, and choose a faction. When you advance in the campaign, you can also unlock powerful new units for your multiplayer battles, such as the formidable and swashbuckling Baron of Kell or the brutal demon, Ravos the Ever-Hungry. You can add even more new units to your armies with the Locust expansion, now available for in-app purchase. The Locust expansion introduces select units from Hernfar Guardians and Warband of Scorn to the game, opens up five new maps for your player vs. player battles and gives you command of the Uthuk Y'llan in a savage mini-campaign to undermine the Daqan war effort.
Join In the ActionBattleLore: Command isnât just a digital strategy game; It also provides an excellent gateway into the tabletop action. With the new forces of Hernfar Guardians and Warband of Scorn having just taken the field, ferocious reinforcements like the Razorwings and Mountain Giant coming soon, and the Undead faction on the way, there has never been a better time to get into BattleLore Second Edition. No matter what your level of strategic skill or your favorite tactics may be, whether you prefer tabletop, desktop or mobile gaming, youâll find a vast and engaging and combat experience in BattleLore. Download BattleLore: Command from iTunes or Google Play today!
Discuss this article
in our forums!
The copyrightable portions of BattleLore Second Edition are © 2013 Fantasy Flight Publishing, Inc. BattleLore is a registered trademark of Fantasy Flight Publishing, Inc. Source: Charge into Battle!
|
|
|
|
|
 Logged
|
|
|
|
|

